Getting Started
Welcome
Hi,
It’s awesome to know that you decided to purchase Eco. No doubts, you will join our happy customers community in seconds!
Won’t make any mistake here, because our detailed documentation will guide you. Please be sure to check it out before getting started. We have outlined all kinds of necessary information and keep them easy-to-read-and-follow. Our themes are dedicated to WordPress platform, so we assume that you have already WordPress installed and ready to go.
Wordpress Knowledge Base
To install Eco – your powerful multipurpose WordPress theme, you must have a working version of WordPress already installed. If you need help installing WordPress, follow the instructions in WordPress Codex. Below are all the useful links for WordPress information:
- WordPress Codex – General info about WordPress and how to install on your server.
- First Steps With WordPress – General info about multiple topics about WordPress.
- FAQ New To WordPress – The most popular FAQ’s regarding WordPress.
Theme Requirements
To use Eco, you must be running WordPress 4.4 or higher, PHP 5.4 or higher, and MySQL 5.6 or higher. We have tested it with Mac, Windows and Linux. Below is a list of items you should ensure your host can comply with.
- Check to ensure that your web host has the minimum requirements to run WordPress.
- Always make sure they are running the latest version of WordPress.
- You can download the latest release of WordPress from official WordPress website.
- Always create secure passwords for FTP and Database.
Hosting is more secure when PHP applications, like WordPress, are running using your account’s username instead of the server’s default shared username (www or www-data). The most common way for hosting companies to do this is using PHP. Just ask your potential host if they run PHP or something similar.
Recommended PHP Configuration Limits
Many issues that you may run into such as: white screen, demo content fails when importing, empty page content and other similar issues are all related to low PHP configuration limits. The solution is to increase the PHP limits. You can do this on your own, or contact your web host and ask them to increase those limits to a minimum as follows:
- Max_execution_time 180
- Memory_limit 128M
- Post_max_size 32M
- Upload_max_filesize 32M
Installation
After purchasing Eco, please download the package from ThemeForest. In the package, you can find things like documentation, license, zipped file with theme files and folder with theme files. Please unpack the whole package after downloading it from ThemeForest.
Install Theme via WordPress
- Step 1: Navigate to Appearance >> Themes
- Step 2: Click Add New, then click Upload Theme >> Choose File
- Step 3: Navigate the .zip file on your computer and click “Install Now”
- Step 4: Activate the newly installed theme by going to Appearance > Themes and clicking the Activate button.
- Step 5: IMPORTANT! After theme installation, at the top, you have a box with information about required and optional plugins. To install them and activate, please navigate to Appearance > Install Plugins section.

Note: If you have any problem when installing milo-eco.zip file via WordPress upload please note our Theme Requirements section above.
Install Theme via FTP Upload
SKIP THIS STEP if you have already successfully uploaded Eco theme via WordPress
- Step 1: BACKUP YOUR FILES! Should do it before set up anything, this is always the safest.
- Step 2: Unzip the milo-eco.zip file (usually is Extract Here if you use WinZip or 7Zip).
- Step 3: Login into your hosting server via an FTP client tool (We recommended to use FileZilla).
- Step 4: Upload Eco Theme folder into wp-content/ themes folder on your server.
- Step 5: Go to Appearance >> Themes and choose new theme has just installed and clicking the Activate button to active.
- Step 6: Once your theme is installed and active you will get a prompt at the top of your Dashboard that will ask you to install Eco‘s plugins..
(We will have a post on forum to help you make it)
Install Required Plugins
After install and active theme you need install some required plugins to make Eco working best:

- Contact Form 7: Eco is fully compatible with Contact Form 7, the free form plugin recommended to create a nice form for your site.
- Visual Composer: The popular drag and drop page builder with an intuitive interface to build your content at ease.
- Revolution Slider: Create a responsive or Full-width slider with must-see-effects.
- WP Instagram Widget: A WordPress widget for showing your latest Instagram photos.
- Less & scss PHP Compilers: A plugin to help function build less to css in our themes works.
- MailChimp for WordPress: Adds various highly effective sign-up methods to your site.
- Meta Box: Create custom meta boxes and custom fields for any post type in WordPress.
- Milo Eco Core: The Milo Eco Core plugin.
- Redux Framework: Redux is a simple, truly extensible options framework for WordPress themes and plugins.
- WooCommerce: An e-commerce toolkit that helps you sell anything. Beautifully.
- YITH WooCommerce Compare: YITH WooCommerce Compare allows you to compare more products with WooCommerce plugin, through product attributes.
- YITH WooCommerce Wishlist: YITH WooCommerce Wishlist allows you to add Wishlist functionality to your e-commerce.
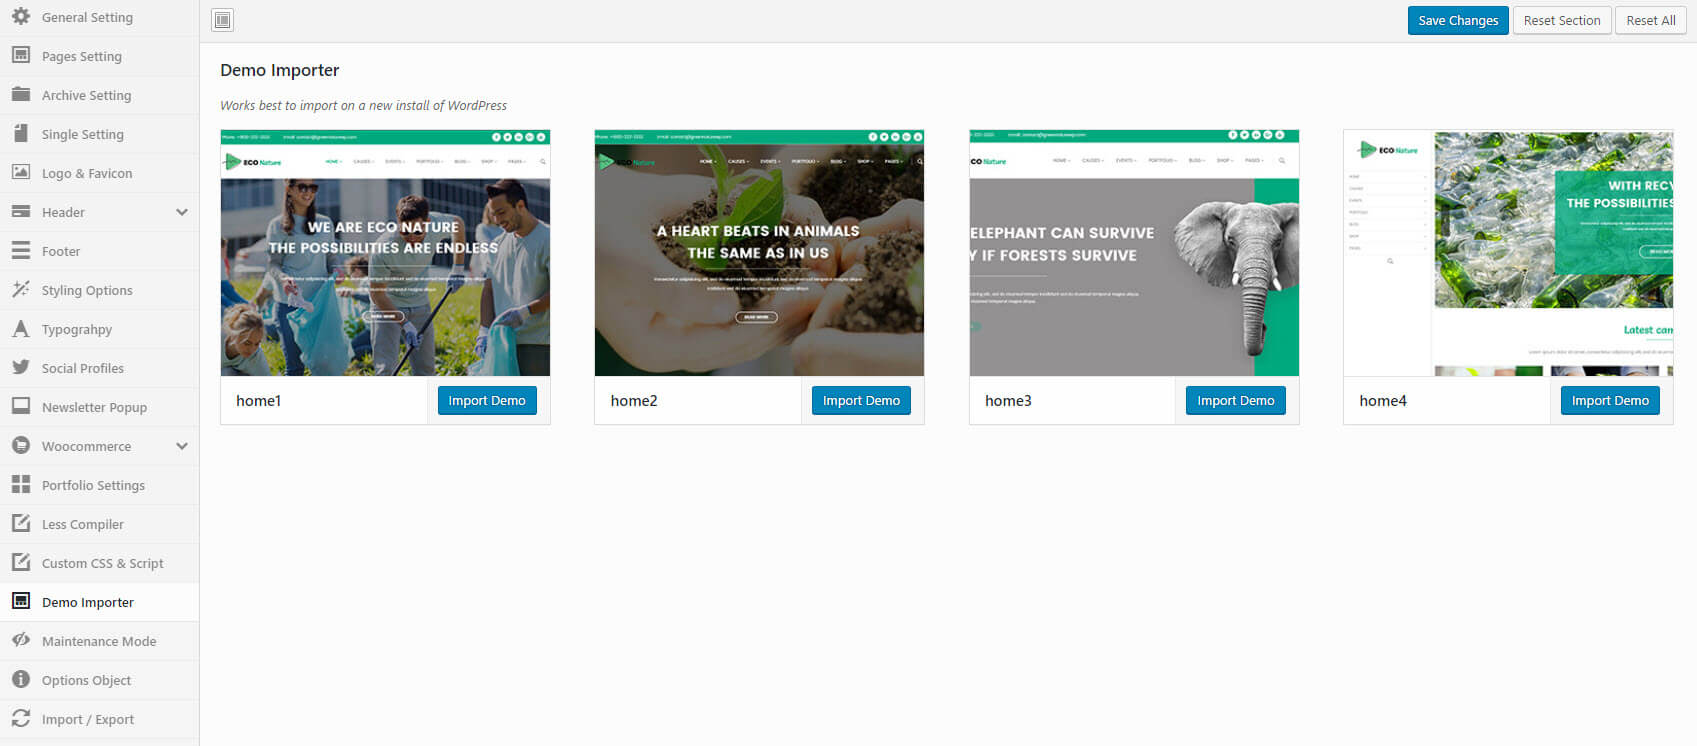
One Click Install Demo Data
With Eco, you can build a functioning website just by clicking a button and install our demo data.
- Step 1: Go to Theme Options >> Demo Importer section
- Step 2: Choose what demo you want to import then click Import Demo button
Update using Envato Toolkit
Auto Update
Some important notices before updating:
We recommend you have a current backup of your site including wp-content folder, wp-config.php file and .htaccess file and a copy of WordPress database. If you don’t know how to take action, you can use several plugins such as UpDraft Plus and WordPress Backup Buddy. Moreover, you should backup MiloTheme’s theme options in Theme Options >> Import/Export.
Please follow these steps to update automatically this theme:
- Step 1 – You need to generate an API key to link your WordPress site to your ThemeForest account. Login to ThemeForest, go to your dashboard and click on “Settings.” The API Keys screen allows you to generate a free API key.
- Step 2 – Download Envato ToolKit, install and activate this plugin. A new menu item, “Envato Toolkit”, will appear in the admin sidebar. Click on the sidebar link and enter your marketplace username and secret API key. Click “Save Settings.” All of your theme purchases will now appear on this page after it refreshes.
- Step 3 – The plugin will now alert you to theme updates – so long as you check the toolkit settings regularly. Click on “install automatically” beside each of your themes to automatically update them. The toolkit settings page also allows you to install themes that you haven’t already uploaded to your site, delete ones you don’t use and view version details. You can also set up theme backups.
- Important! Always Use a Child Theme Updating your themes shouldn’t affect any customization to your website as long as you’re using a child theme.
Manual Update
Following these steps to update your theme:
- Step 1 – Log into your ThemeForest account and navigate to your downloads tab. Find the “Eco” theme purchase.
- Step 2 – Click the Download button next to it and choose to download the Installable WordPress file only which is just the WordPress file, or choose the All files & documentation which is the entire package that contains everything.
- Step 3: Update theme via WordPress upload method above or via FTP Client tool.
WordPress Configuration
You need to configure WordPress. You can adjust WordPress settings as follows:
Step 1 – You can set Site Title, Tagline in Settings >> General.
Step 2 – You can set Blog pages show at most and Front Page displays in Settings >> Reading.

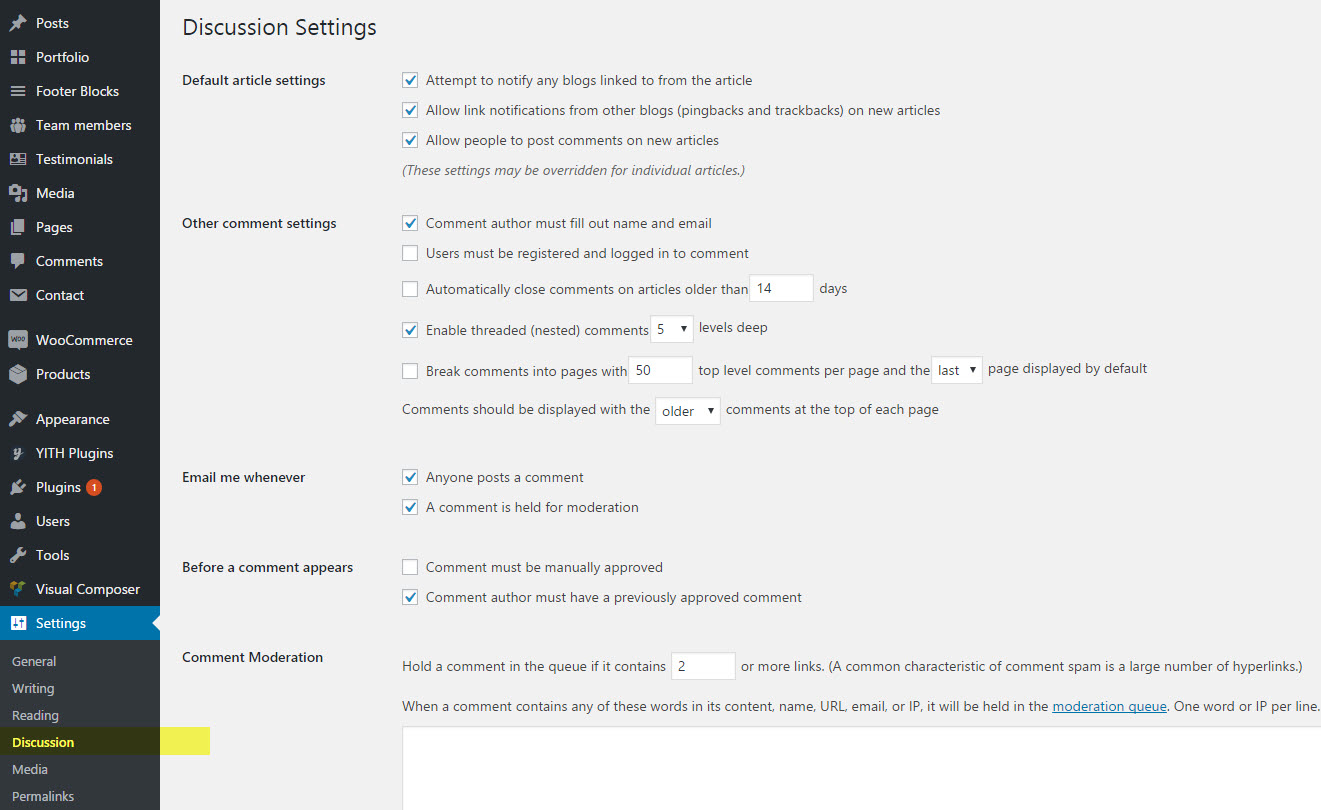
Step 3 – You can set Discussion settings in Settings >> Discussion.
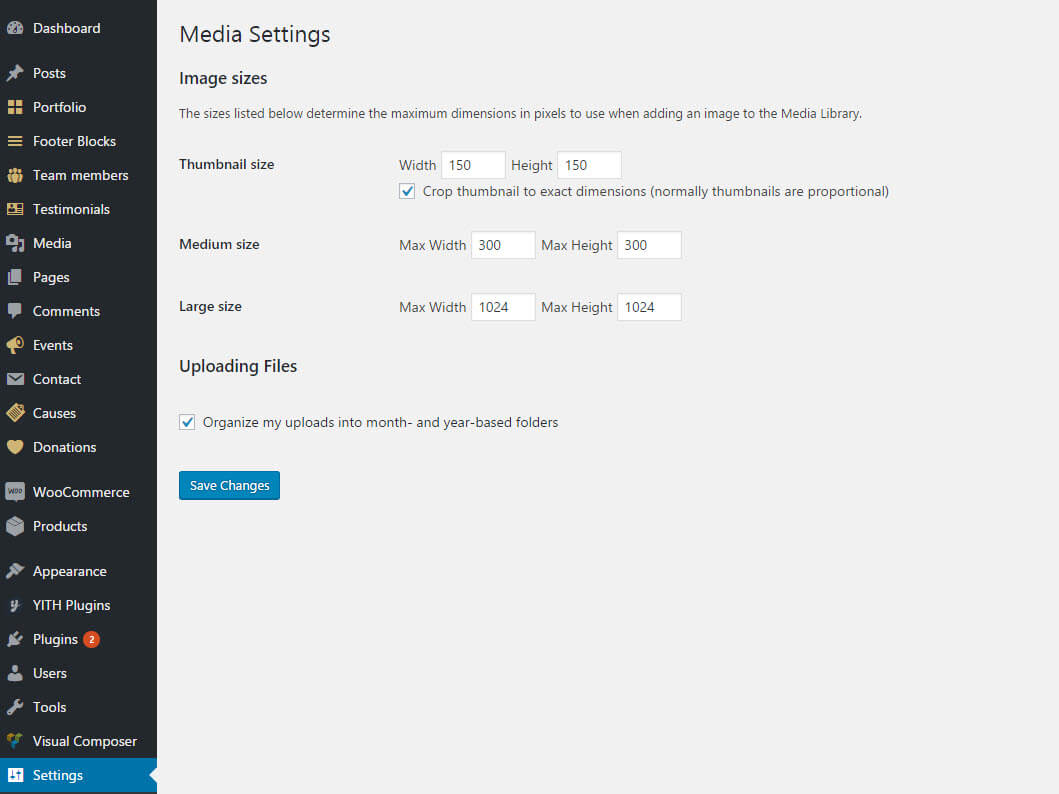
Step 4 – You can change Image sizes in Settings >> Media. You can set image size for blog archive, single blog post and image for widget sidebar.
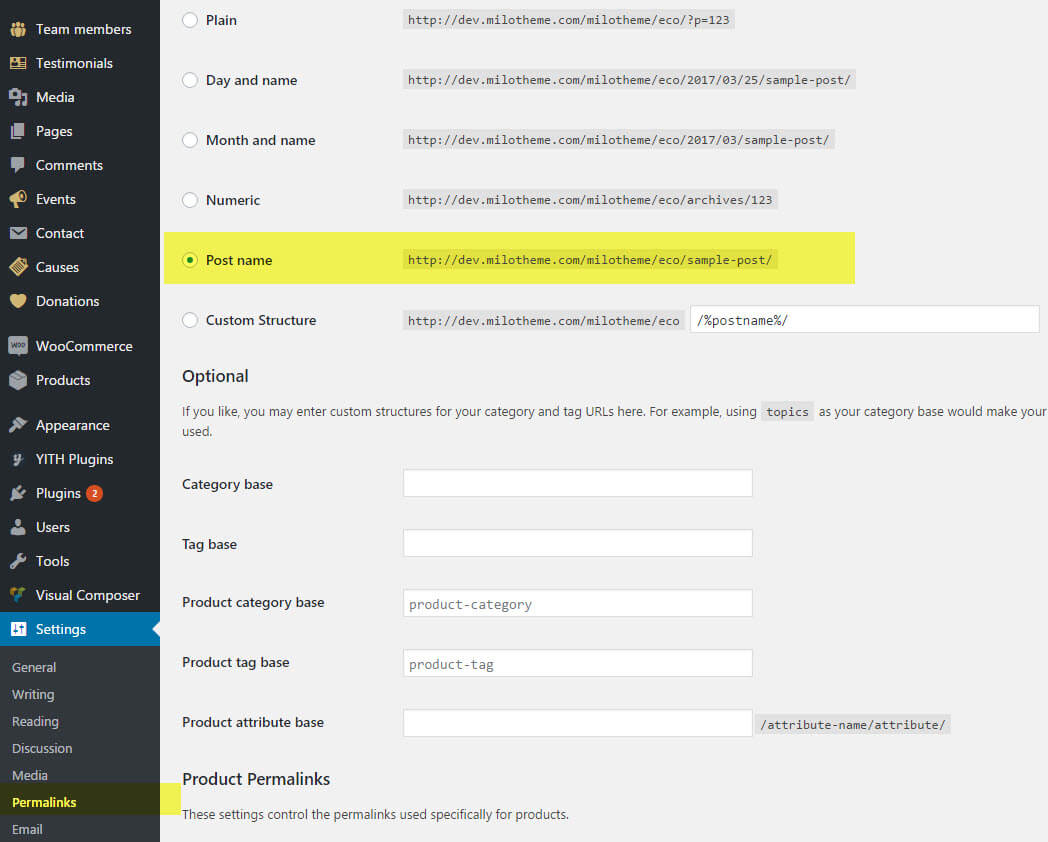
Step 5 – You should ensure that a non-default permalink setting is selected, e.g. Day and name in Settings >> Permalinks.
Theme Options
By clicking on the “Theme Options” menu, you’ll be able to change all template specific settings.
General Setting
“General Settings” tab is divided into a few sections which allows you to configure general settings for pages as Layout Style, Page Preloader… or configure Maintenance Mode.
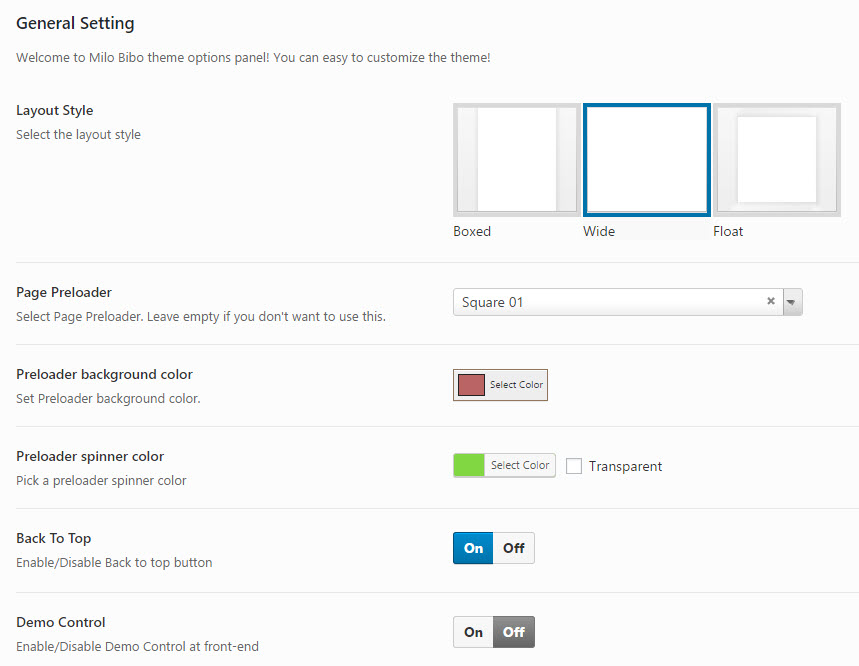
General Setting
- Layout Style: Set layout style for your website with 3 options Boxed, Wide and Float.
- Page Preloader: Select Page Preloader from drop down list. Leave empty if you don’t want to use this feature.
- Preloader background color: Set Preloader background color.
- Preloader spinner color: Pick a preloader spinner color.
- Demo Control: Turn On/Off demo control panel at front-end.
- Back To Top: Turn On/Off back to top button.
Maintenance Mode
- You can set page title, time,… for maintenance or coming soon page

Page Setting
Page Setting tab allow you to configure settings for your Pages.
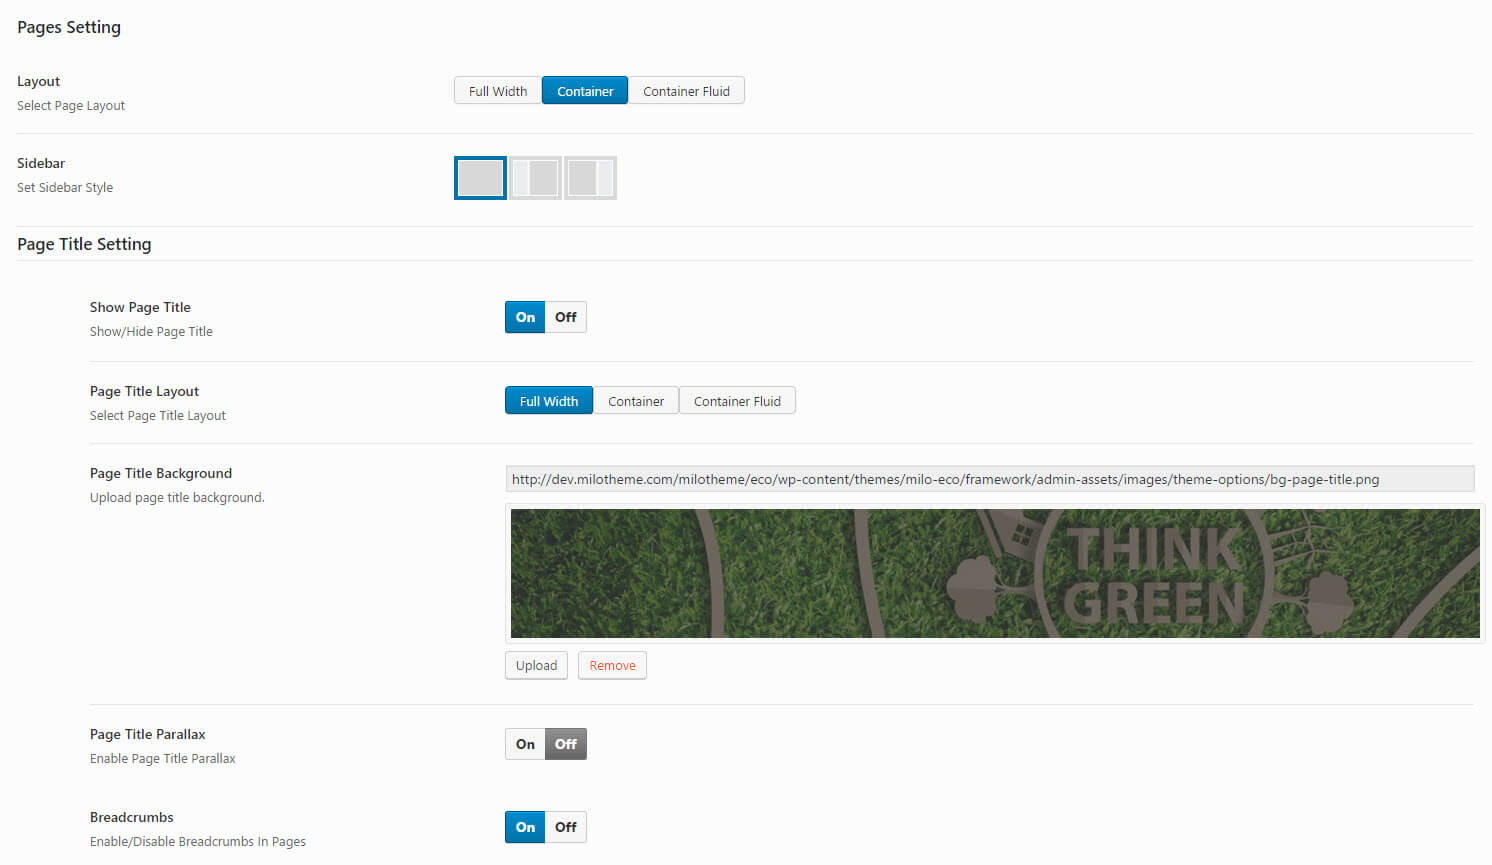
- Layout: Set page layout with 3 options Full Width, Container or Container Fluid.
- Sidebar: Set sidebar style with 3 options Left sidebar, Right sidebar or No Sidebar.
Pages Title Setting
- Show Page Title: Set page title On/Off.
- Page Title Layout: Set page title layout with 3 options: Full Width, Container or Container Fluid.
- Page Title Parallax: Set page title parallax On/Off .
- Page Title Background: Select a background image for page title.
- Breadcrumbs: Turn breadcrumbs of Page On/Off .
Archive Blog
Archive Blog tab allow you configure archive blog page which display all your posts.

Archive Blog
- Layout: Set page layout for archive blog page with 3 options FullWidth, Container or Container Fluid.
- Sidebar: Set sidebar style for archive page with 3 options Left, Right, No-Sidebar, Left or Right sidebar.
- Right Sidebar or Left Sidebar: Set sidebar for Right sidebar or Left sidebar.
- Archive Display Type: Set Archive Display Type for archive page with 4 options Large Image, Medium Image, Grid or Masonry.
- Paging Style: Set archive paging style with 3 options Default, Load More or Infinity Scroll.
- Length Of Excerpt: Set length of the Excerpt.
Archive Title Setting
- Show Archive Title: Turn On/Off archive blog title.
- Archive Title Layout: Set page title layout for archive page with 3 options: Full Width, Container or Container Fluid.
- Archive Title Parallax: Turn On/Off page title parallax for archive page.
- Archive Title Background: Set a background image for archive blog title.
- Breadcrumbs: Turn breadcrumbs On/Off.
Single Blog
Single Blog tab allows you to configure single blog page (single post).

Single Blog
- Layout: Set page layout for single blog with 3 options Full Width, Container or Container Fluid.
- Sidebar: Set sidebar style with 3 options No Sidebar, Left or Right sidebar.
- Left or Right Sidebar: Set sidebar for Right sidebar or Left sidebar.
- Show Post Navigation: Turn post navigation On/Off (Go to next or preview post).
- Show Author Info: Turn author information On/Off.
Single Blog Title Setting
- Show Single Blog Title: Turn On/Off single blog title.
- Single Blog Title Layout: Set page title layout for single post with 3 options: Full Width, Container or Container Fluid.
- Single Blog Title Background: Set a background image for single blog title.
- Single Blog Title Parallax: Turn On/Off page title parallax for single blog.
- Breadcrumbs: Turn breadcrumbs On/Off.
Logo & Favicon
![]()
In Logo & Favicon tab, you can change website logo, sticky logo and custom favicon very easy.
- Logo: Set logo image.
- Retina Logo: Set logo for retina screen. If you not set this option, retina logo with use “Default” Logo image
- Sticky Logo: Set logo sticky image. If you not set this option, sticky logo with use “Default” Logo image
- Custom Favicon: Set custom favicon image. The best is use an image have size 16 x 16 (pixel).
Header Options
Configure Header Tab is the most important in Theme Options. Please read carefully description below:
- Show/Hide Top bar: Turn header Top bar On/Off.
- Top bar layout width: Set Top bar layout width with 2 options Container or Full Width.
- Top bar Layout: Set header top bar layout with 2 options 1 Colum or 2 Columns.
- Top Left Sidebar: Set sidebar for Top Left Sidebar.
- Top Right Sidebar: Set sidebar for Top Right Sidebar.
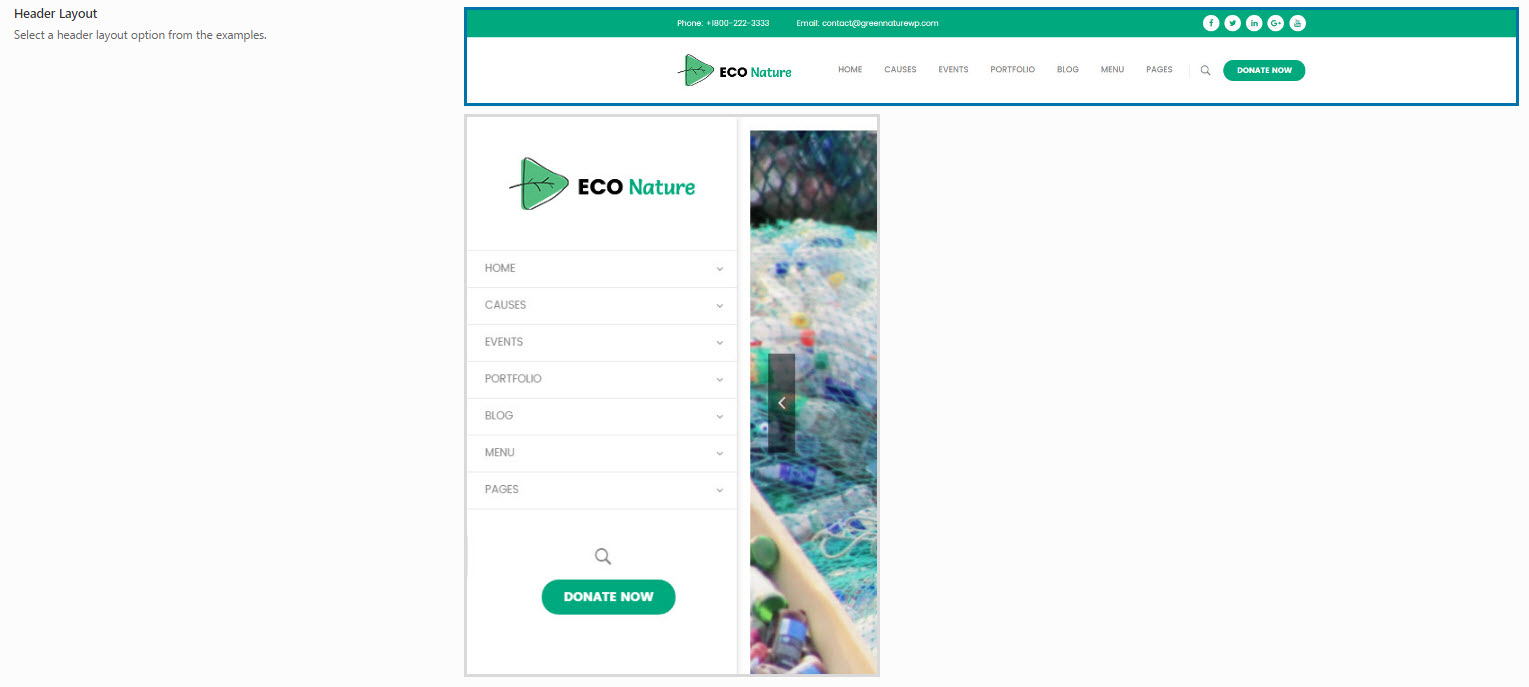
- Header Layout: Set header layout with 3 premade header.
Header Navigation
- Header navigation Layout: Set layout style for Header navigation with 2 options Container or Full Width.
- Header Float: Turn header float On/Off.
- Show/Hide Header Sticky: Enable/Disable header sticky.
- Search Box Style: Set Search Box style with 2 options Standard or Ajax Search.
Header Customize
Header Customize tab allows you to configure Mega Menu Animation (we build our Mega Menu animation base on Animate.css)… You can easy change what you want to show on Header by turn ON Head Customize X (X is Left, Right or Navigation). Please note: Left is left of the Logo and Right is right of the Logo.

- Mega menu Animation: Set animation for Mega Menu.
Choose what you want to show by drag and drop from Disable list to Enable list.
Header Customize Navigation
- Header Customize Navigation: Change what you want to show after Navigation.
- Custom Social Profiles: Set custom social profile network. You can choose many as you want.
- Custom Text Content: You can use HTML for custom text.
Header Customize Left
- Header Customize Left: Change what you want to show at the left of Logo.
- Custom Social Profiles: Set custom social profile network. You can choose many as you want.
- Custom Text Content: You can use HTML for custom text.
Header Customize Right
- Header Customize Right: Change what you want to show at the right of Logo.
- Custom Social Profiles: Set custom social profile network. You can choose many as you want.
- Custom Text Content: You can use HTML for custom text.
Mobile Header
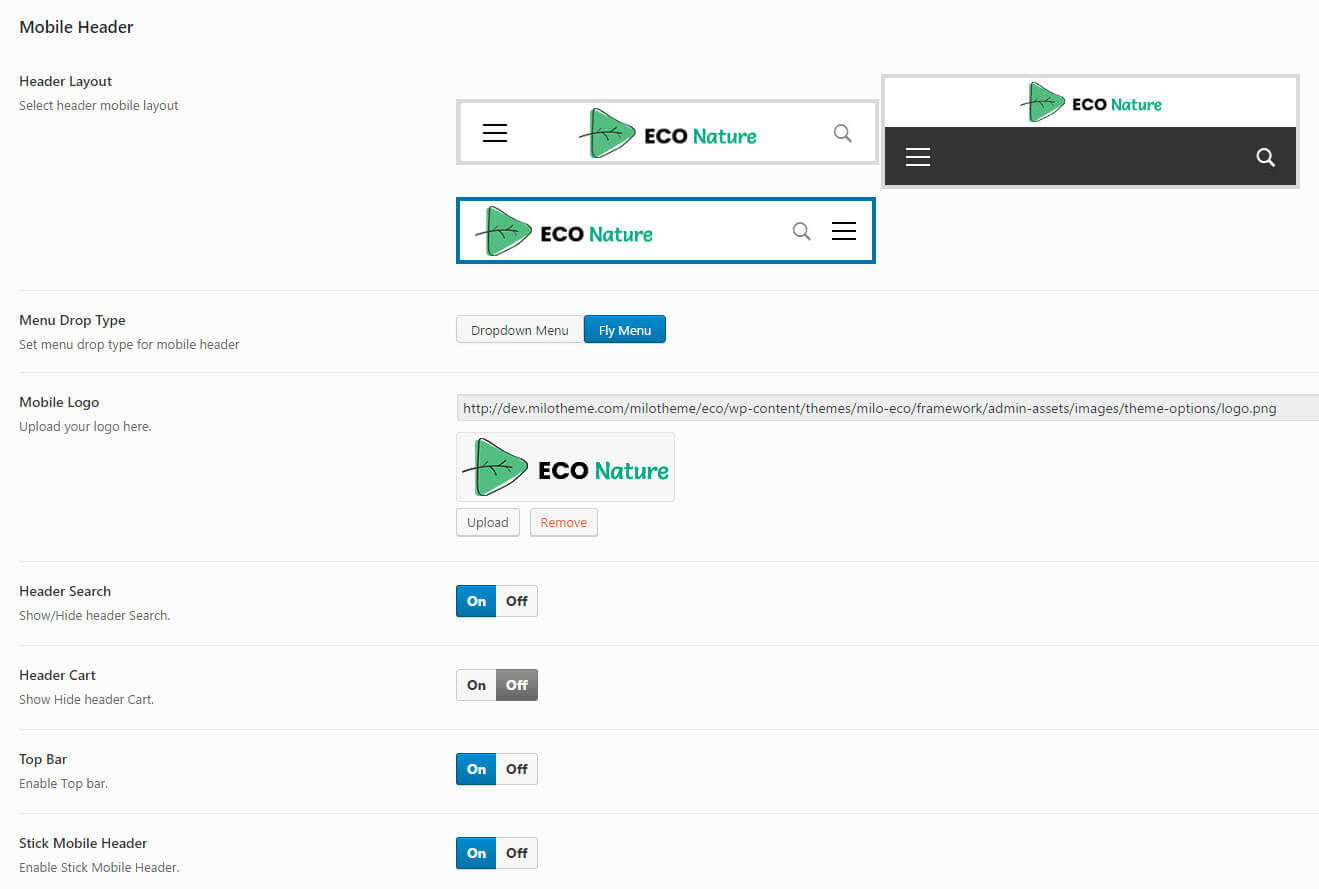
- Header Layout: Set mobile header layout with 3 premade options.
- Menu Drop Type: Set mobile menu style with 2 options Dropdown Menu or Fly Menu.
- Mobile Logo: Set logo image for Mobile devices.
- Top Bar: Turn top bar On/Off.
- Sticky Mobile Header: Turn sticky mobile menu On/Off.
Footer
In this tab, you can set Footer for your page. Please create Footer Post type first then use Visual Composer to build footer. If you can’t use Visual Composer for Footer post type please change Roles in Visual Composer settings.

- Layout: Set footer layout with 3 options Full width, Container or Container Fluid.
- Select Footer Block: Set footer block has created by Footer Post type.
Styling Options
Styling options Tab allows you to configure Primary color, Secondary color, Text color, Heading color and Link color for your website. Please note to make this option working fine, may be you need change some settings in php.ini of your hosting server.
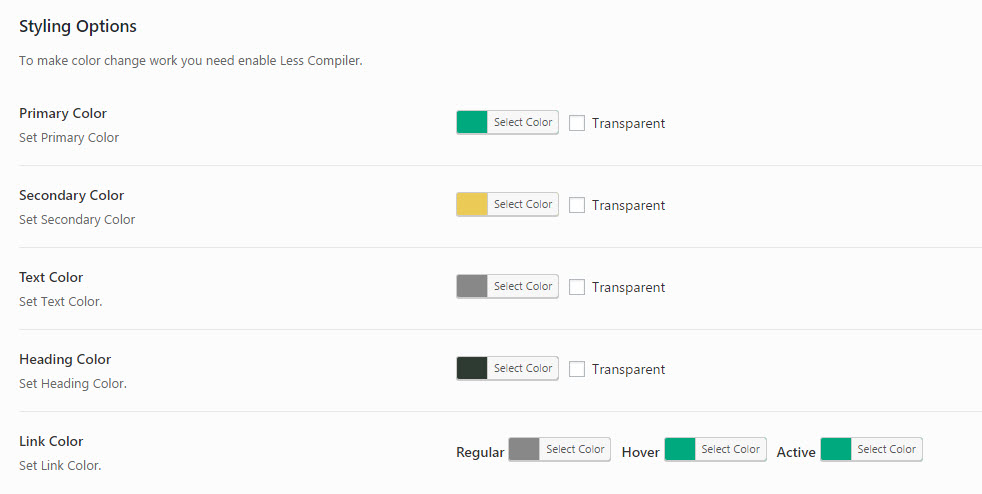
- Primary Color: Set Primary color.
- Secondary Color: Set Secondary color.
- Text Color: Set text color.
- Link Color: Set Link color.
- Heading Color: Set color for heading.
Typography
Typography tab allows you set Fonts for body, menu, page title, page sub title and Heading from Google Fonts. Have about 600 fonts.
Social Profiles
Social Profiles tab allows you to show media social network to make connect your website with your social network. You should insert link to your social network.
Newsletter Popup
Newsletter Popup tab allows you create a Newsletter promo Popup if you want to show something special to customer as Sale Off,…

- Show Popup: Set popup On/Off.
- Popup Width: Set the width of popup.
- Popup Height: Set the height of popup.
- Popup Effect: Set popup effect.
- Popup Delay: Set delay time of popup (caculate by miliseconds).
- Popup Content: Set the content for popup. You can insert shortcode here. Please not you should change Editor mode to Text before Save.
- Popup Background: Set background image for popup.
WooCommerce
Woocommerce tab have some sub sections allows you to set Product display, archive product page and single product page.
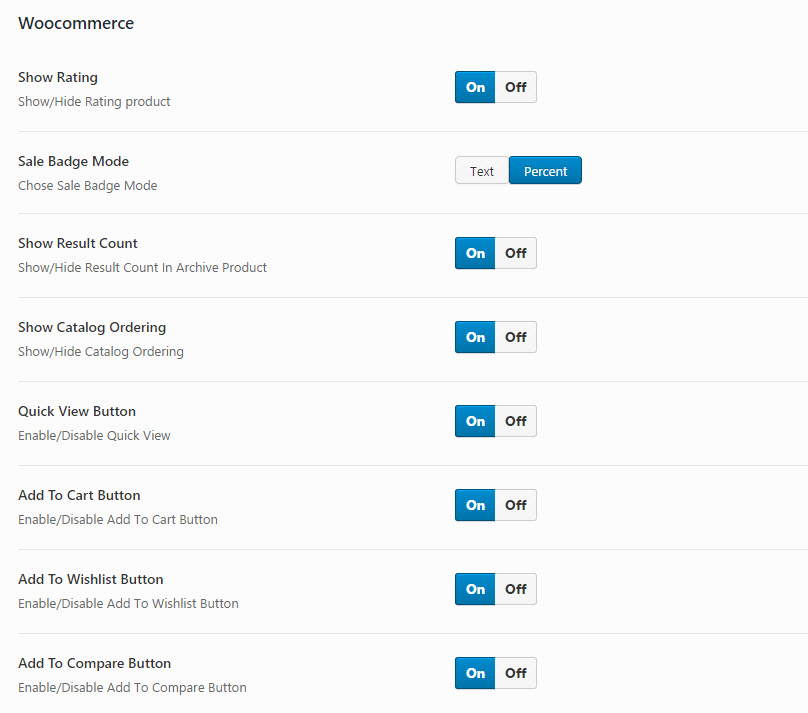
- Show Rating: Turn rating of product On/Off.
- Sale Badge Mode: Set Sale Badge Mode style with 2 options Text or Percent.
- Show Result Count: Show products result count on archive page.
- Show Catalog Ordering: Show catalog ordering on archive page.
- Quick View Button: Turn quick view button of product On/Off.
- Add to cart button: Turn add to cart button of product On/Off.
- Add to Wishlist Button: Turn add to wishlist button of product On/Off.
- Add to Compare Button: Turn add to compare button of product On/Off.
Archive Product
Archive Product tab allow you change settings for Shop page.
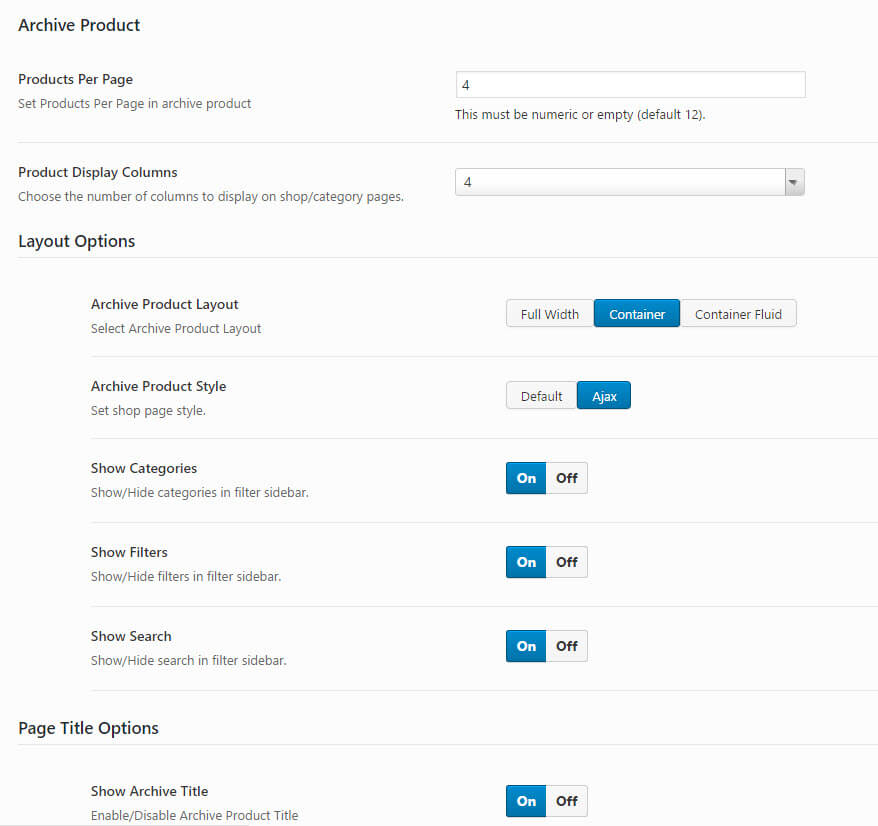
- Product Per Page: Set products per page for archive page.
- Product Display Columns: Choose number of columns to display on shop/categories pages.
- Archive Product Featured Image: Set featured image for Shop page. With category you can set it in category options.
Layout Options
- Archive Page Product layout: Set Archive page layout with 3 options Full Width, Container or Container Fluid.
- Archive Product Style: Set style for archive product page.
- Archive Product Sidebar: Set archive product sidebar.
- Archive Product Left or Right Sidebar: Set left or right sidebar for archive product page.
Page Title Options
- Show Archive Title: Turn archive title for shop page On/Off.
- Archive Product Layout: Set layout style for archive product.
- Archive Product Title Parallax: Turn archive product title parallax On/Off.
- Archive Product Title Background: Set background image for archive product title.
- Breadcrumbs in Archive Product: Turn breadcrumbs in archive product On/Off.
Single Product
Archive Product tab allow you change settings for Single product page.

Layout Options
- Single Product Layout: Set Single product layout with 3 optiosn Full Width, Container or Container Fluid.
- Single Product Sidebar: Set sidebar for single product page.
Page Title Options
- Show Single Title: Turn title for single product page On/Off.
- Single Product Title Layout: Set single product title layout with 3 options Full Width, Container or Container Fluid.
- Single Product Title Parallax: Turn single product title parallax On/Off.
- Single Product Title Background: Set background image for single product title.
- Breadcrumbs in Single Product: Turn breadcrumbs in single product On/Off.
Product Related Options
- Related Product Total Record: Set number of related product you want to show on single product page.
- Related Product Display Columns: Set number of columns to display related product.
Portfolio Settings
Portfolio Settings tab allow you change settings for Portfolio Post type display as single page.
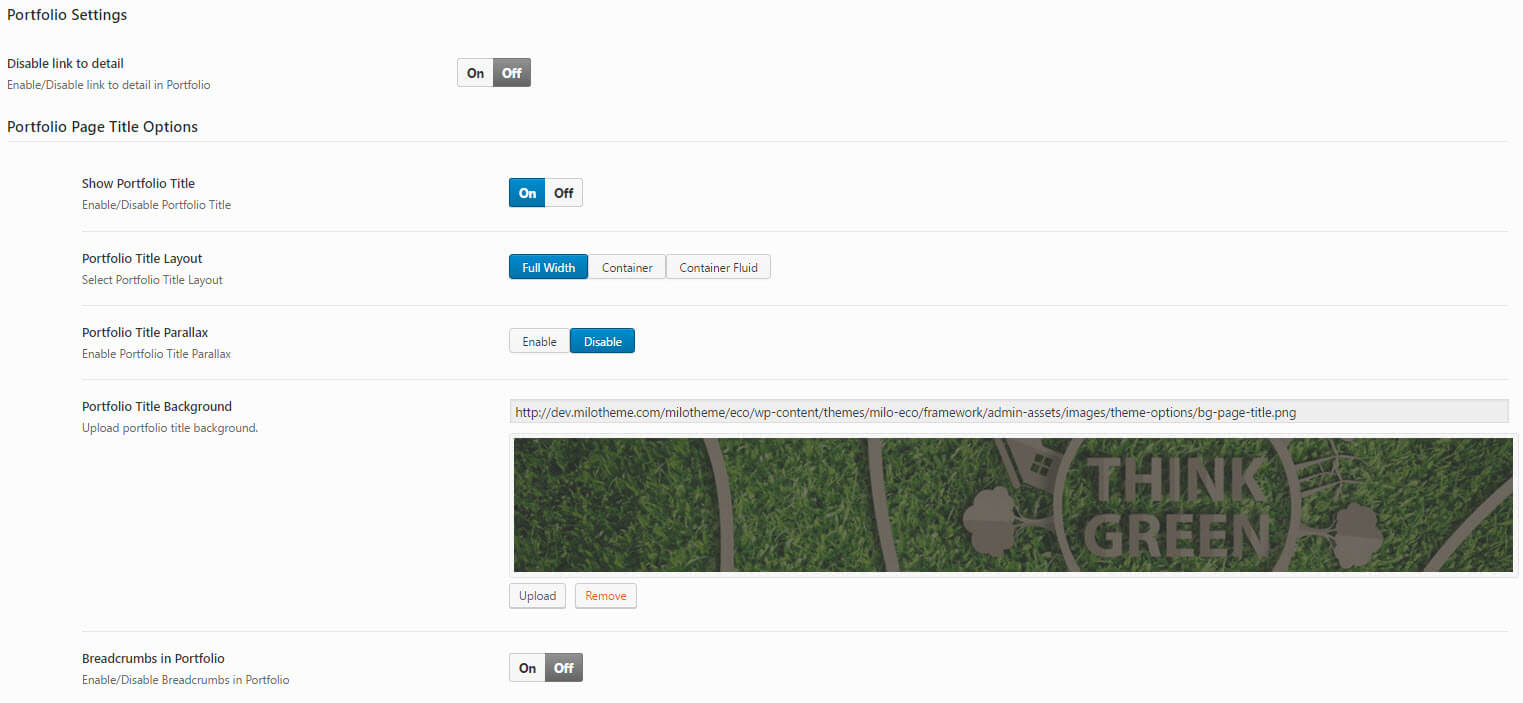
Page Title Options
- Show Portfolio Title: Show/Hide Portfolio page title
- Portfolio Title Layout: Set Portfolio Page title layout with 3 options Fullwidth, Container, Container-Fluid.
- Portfolio Title Parallax: Enable/Disable parallax effect for page title background.
- Portfolio Title Background: set background image for Portfolio Page title.
- Breadcrumb in Portfolio: Show/Hide Breadcrumb.

Single Portfolio Options
- Single Portfolio Layout: Set Portfolio single details layout based on Gallery Media Type.
- Show/Hide Related: Show/Hide related Portfolio project.
- Portfolio Related Style: Set portfolio Related style: Small Square, Big Square, Landscape, Portrait.
- Portfolio Related Columns: set columns of Related portfolio.
- Portfolio Related Overlay Style: Set Related portfolio Overlay style. We have 5 options to choose now.
- Portfolio Social: Choose Social Network Link you want to display on single page.
Less Compiler
If you want to custom color or CSS you must enable this option.
To make this option work you need install plugin Less & scss PHP Compilers.
Custom CSS & Script
If you change or add Custom CSS, you must enable Less Compiler.
Demo Importer
As describe above. You can get our demo by one-click demo install. Please read more on our forum to make any working fine.
Import /Export
In this tab, you can import or export Theme Options data to backup or use on other website.
Menu
WordPress menu is very clean and easy to use. However you need to know some basic settings.
Assign Menu
- Go to Appearance >> Menus then select menu you want to Edit or you can create new menu.
- Find Menu Settings at the bottom of page the select location for menu.
Bibo supports 2 menu location:
- Primary Menu: the main menu use in the header.
- Mobile Menu: the menu use to display on mobile device.

How to create Menu
Our theme has support mega menu system. The first you need to know about create a new menu.
- Step 1: Go to Appearance >> Menus.
- Step 2: Click Create A New Menu link. Enter menu name then click Create Menu.
- Step 3: To add menu item, select what you want to add to menu on left-side then click Add to Menu.
- Step 4: To create a simple dropdown menu you can drag and drop menu item. With sub menu you can read more description below to know about menu item level.
- Step 5: After setting menu, you go bottom of the page and assign menu Location then Save Menu.

Mega Menu Settings
Our theme supports Mega Menu with 2 sub-menu styles: Column and Tab. To create Mega Menu, you click on menu item to open Menu Item level 0 >> Check Enable MegaMenu to use Mega Menu.

Column Style
Column Style display menu items with columns layout.
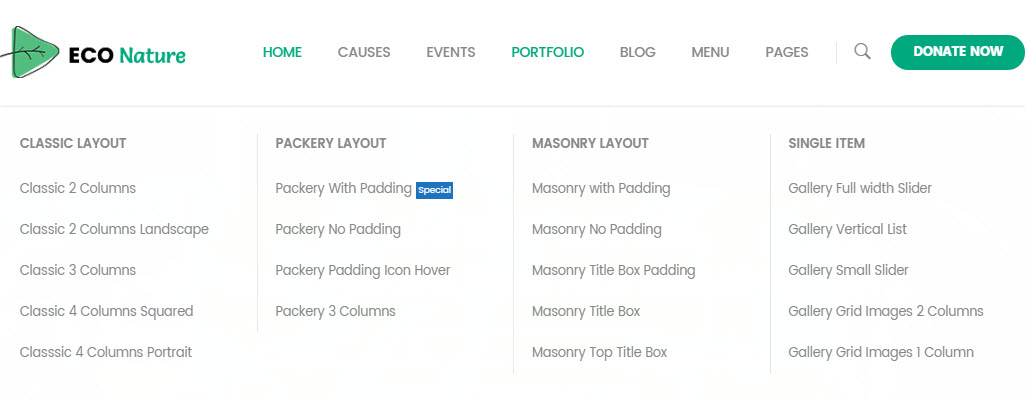
Column Style use 3 menu item levels. You also can set icon for menu item and sub label.

Step 1: Click on a Level 0 menu item and check on Enable MegaMenu.
Step 2: Set Megamenu style is Column and set MegaMenu columns for menu item.

We have some extra option as Background Image for menu item or Sub menu full width to use sub menu full width. Hide Mega menu heading to hide Mega Menu heading.
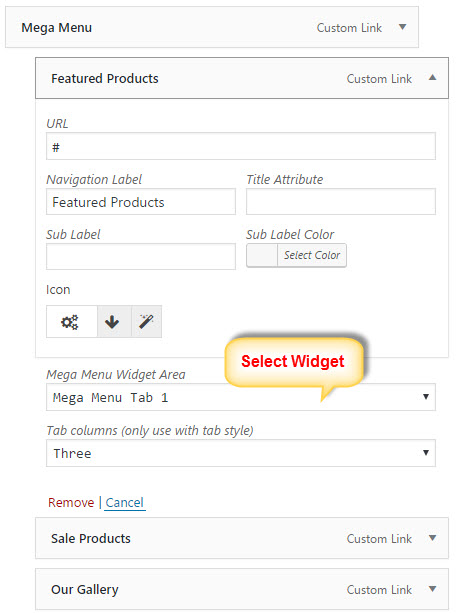
Tab Style
With Tab Style you can show many content from widget.
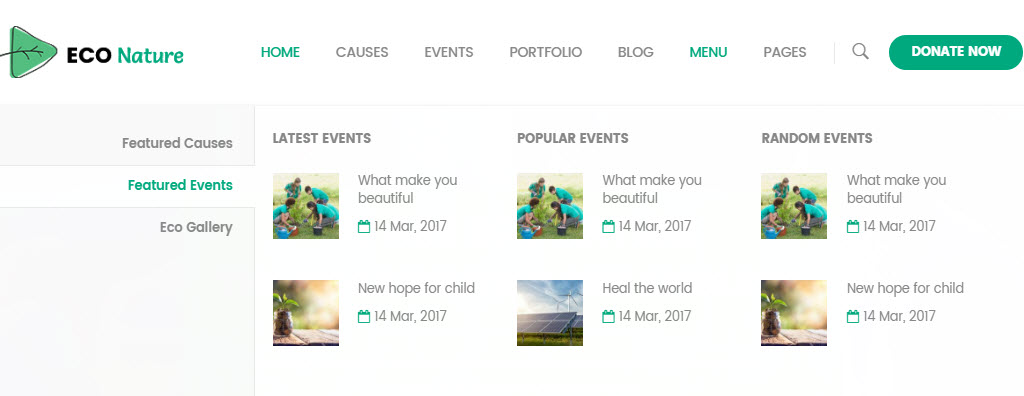
Tab style use 2 menu item levels. On menu level 0, select Mega Menu style: Tab and select MegaMenu Columns for your menu.
Step 1: Click on a Level 0 menu item and check on Enable MegaMenu.
Step 2: Set Megamenu style is Tab and set MegaMenu columns for menu item.

Step 3: Click on menu level 1 to open then select Mega Menu Widget Area. You can go to Appearance >> Widgets to create widget for menu. We added function add custom sidebar and you can create new sidebar very easy.
Similar above, we have some extra option as Background Image for menu item or Sub menu full width to use sub menu full width. Hide Mega menu heading to hide Mega Menu heading.
Page
How to create New Page
- Step 1: Navigate to Pages in your admin sidebar and click Add New option.
- Step 2: Input a new name for your page, then find the Page Attributes box on right side.
- Step 3: In Page Attributes box, set Page Parent in dropdown list.
- Step 4: Scroll down to Page Options to make the page you want then click Publish.

Page Options
Our theme have many page options to help you display almost what you want. Please note if you don’t set anything (Default option) in Page Options it will inherit from Theme Options.
Layout
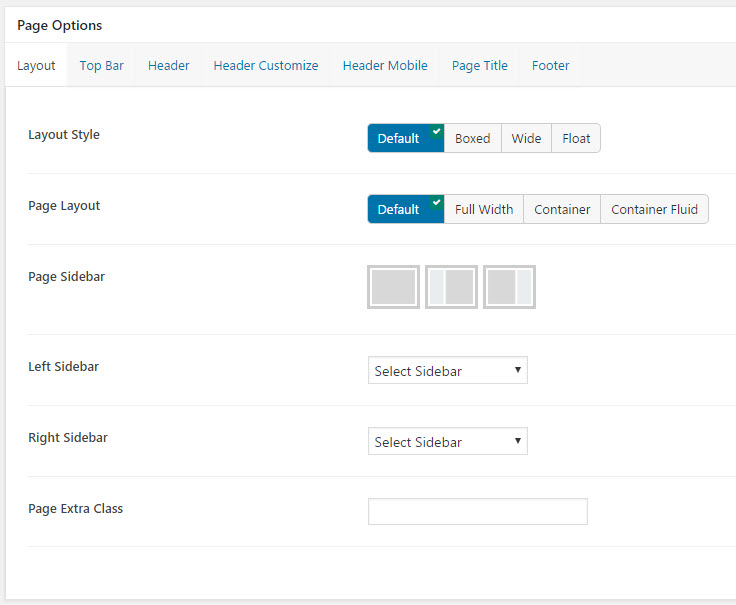
- Layout Style: Set layout style for page with 4 options Default, Boxed, Wide or Float.
- Page Layout: Set page layout (with header you can set in header tab settings) with 4 options Default, Full Width, Container or Container Fluid.
- Page Sidebar: Set sidebar style for page.
- Left Sidebar: Set left sidebar for page if sidebar style is Left Sidebar.
- Right Sidebar: Set right sidebar for page if sidebar style is Right Sidebar.
- Page Class Extra: Enter page class with special page.
Top Bar

- Show/Hide Top Bar: Turn top bar of page On/Off .
- Top bar layout width: Set width of page top bar with 3 options Default, Container or Full width.
- Top Bar Layout: Set top bar layout of page.
- Top Left Sidebar: Set sidebar for Top Left Sidebar.
- Top Right Sidebar: Set sidebar for Top Right Sidebar.
Header
You can override page header customize for page that mean pages can have different header. Similar options in Theme Options you have the same page options.
Page Header Customize

You can override page header customize for page. Similar options in Theme Options you have the same page options.
Header Mobile
You can override page header mobile for page. Similar options in Theme Options you have the same page options.
Blog Post
How to create New Post
No matter which method you using to display your blog posts, the first thing you need to do is create the blog posts.
See below for information on how to create blog posts.:
- Step 1: Navigate to Posts >> Add New in your WordPress admin sidebar.
- Step 2: Create a title, and insert your post content in the editing field.
- Step 3: Add Categories from the right side. To assign it to the post, check the box next to the Category name.
- Step 4: Add Tags from the right side. Type the name of the tag in the field, separate multiple tags with commas.
- Step 5: For a single image, click the first Featured Image Box, select an image and click the Set Featured Image button.
- Step 6: Once you are finished, click Publish to save the post.
Here is the screenshot that shows the various areas of the blog post page.

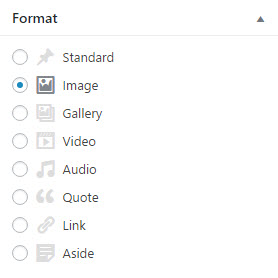
Post Format
Our theme supports 7 post formats that allows you to choose the specific format for your blog. You can choose different types of post to make your blog be more interesting. Follow below steps to see the description of Post Formats and Global setting of Post.
Page Options
Same as Page Options box of Page, Post have similar Page Options. You can read Page Options section above.
Custom Post Type
Manage Custom Post Type is also important to use our theme.
Team members
Create New Team Member
- Step 1: Navigate to Team members >> Add New in your WordPress admin sidebar
- Step 2: Enter title and description for team member item.
- Step 3: Choose TeamMember Categories and Featured Image of new team member on the right side.
- Step 4: Go to Team member information box and fill out information.
- Step 5: Once you are finished, click Publish to save team member item.
Team Member Setting
- Name: Enter name of member.
- Position: Enter position of member.
- Social Profiles: Enter the social profile URLs of member
Footer Blocks
Footer Blocks custom post type allow you use Visual Composer to make footer. Please note may be you need go to Visual Composer -> Role Manager. Post type option you must select Custom and checked to milo_footer post type to get Footer can build by Visual Composer.
Create New Footer Blocks
- Step 1: Navigate to Footer Blocks >> Add New in your WordPress admin sidebar
- Step 2: Building footer blocks by using Visual Composer shortcode.
- Step 3: Once you are finished, click Publish to save footer block item.
Portfolio
Create New Portfolio Project
- Step 1: Navigate to Portfolio >> Add New in your WordPress admin sidebar
- Step 2: Enter title and description for portfolio item.
- Step 3: Set Media type of Portfolio. Set thumbnail size is very important if you want to display portfolio with Packery layout. View Detail Style is base on Media type is Gallery
- Step 4: Choose Portfolio Categories and Featured Image of new portfolio on the right side.
- Step 5: Choose Portfolio tags and set featured Image
- Step 6: Add custom field information
- Step 7: Once you are finished, click Publish to save portfolio item.
Portfolio Setting
- With each Media type you will see new metabox for it.
Testimonial
Create New Testimonial
- Step 1: Navigate to Testimonials >> Add New in your WordPress admin sidebar
- Step 2: Enter title and description for team member item.
- Step 3: Choose Testimonial Categories and Featured Image of new team member on the right side.
- Step 4: Go to Testimonial information box and fill out information.
- Step 5: Once you are finished, click Publish to save testimonial item.
Testimonial Setting
- Position: Enter position of author.
- URL: Enter the profile URLs of testimonial author
Events
Create New Event
- Step 1: Navigate to Events >> Add New in your WordPress admin sidebar
- Step 2: Enter title and description for Event item.
- Step 3: Choose Event Categories, Location and Featured Image of new Event on the right side.
- Step 4: Go to Event information box and fill out information.
- Step 5: Once you are finished, click Publish to save Event item.
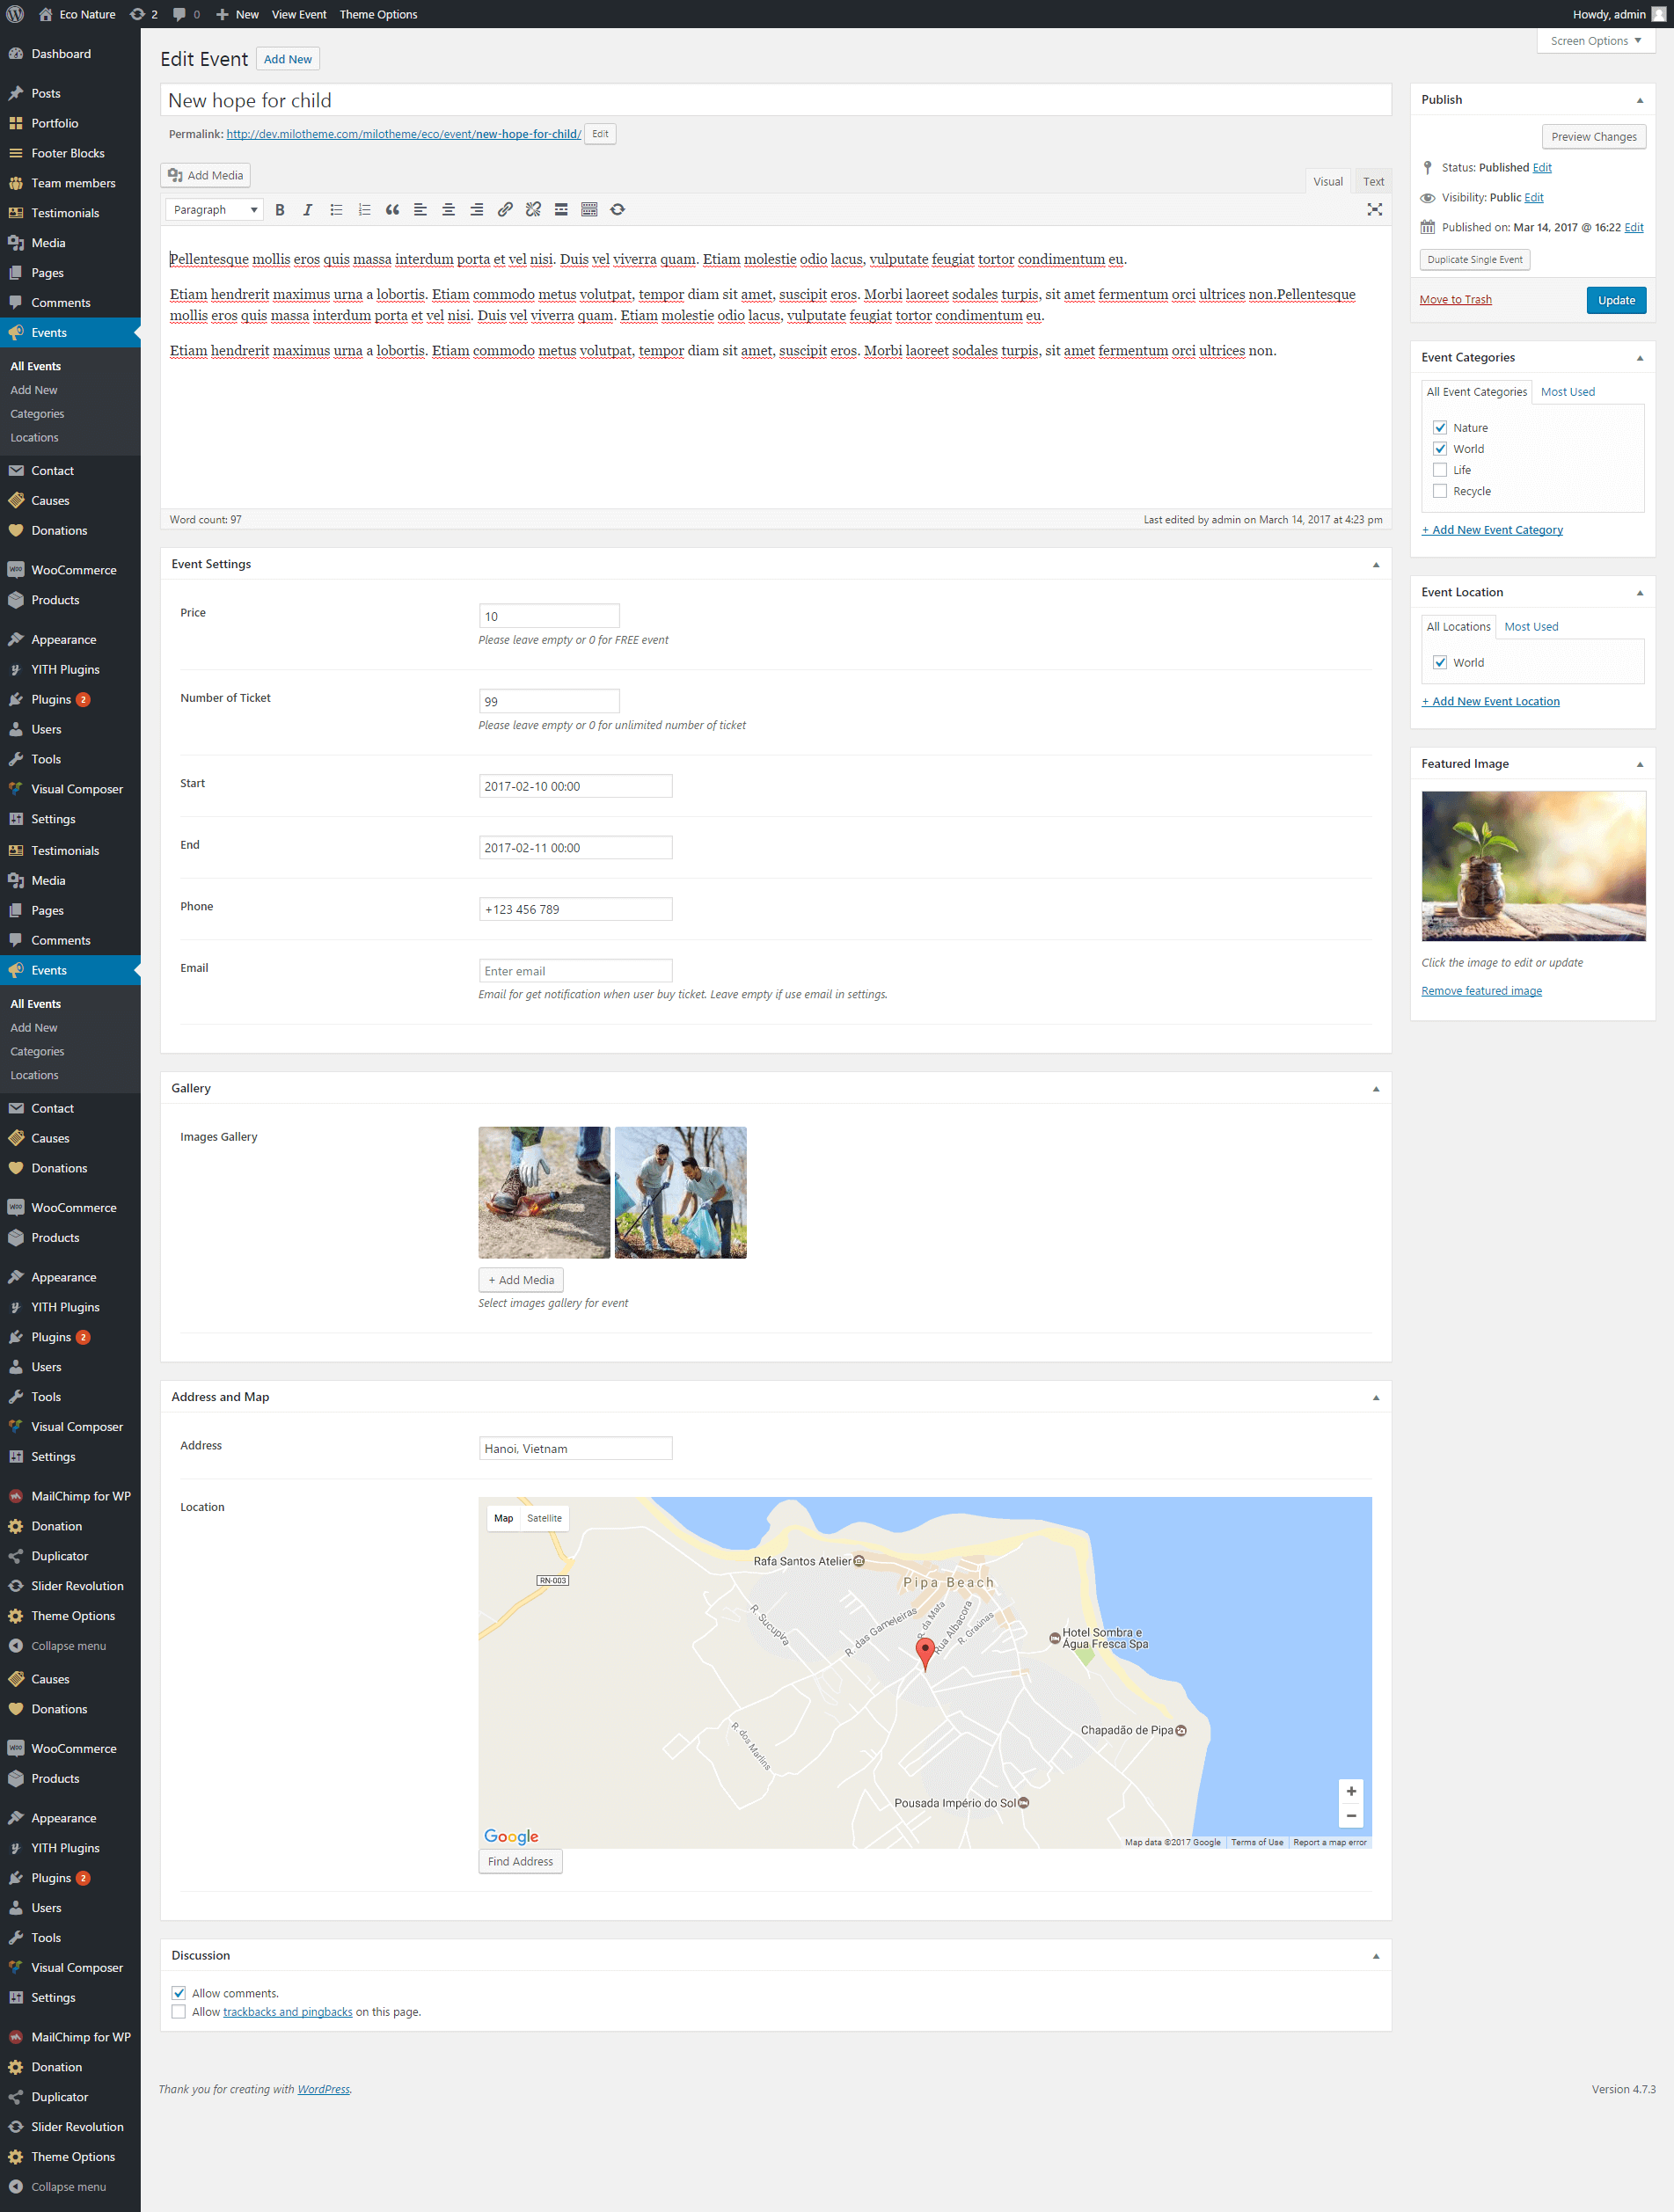
Event Setting
- Please see image below for all event data.
Causes
Create New Cause
- Step 1: Navigate to Causes >> Add New in your WordPress admin sidebar
- Step 2: Enter title and description for Cause item.
- Step 3: Choose Cause Categories, Location and Featured Image of new Cause on the right side.
- Step 4: Go to Cause information box and fill out information.
- Step 5: Once you are finished, click Publish to save cause item.
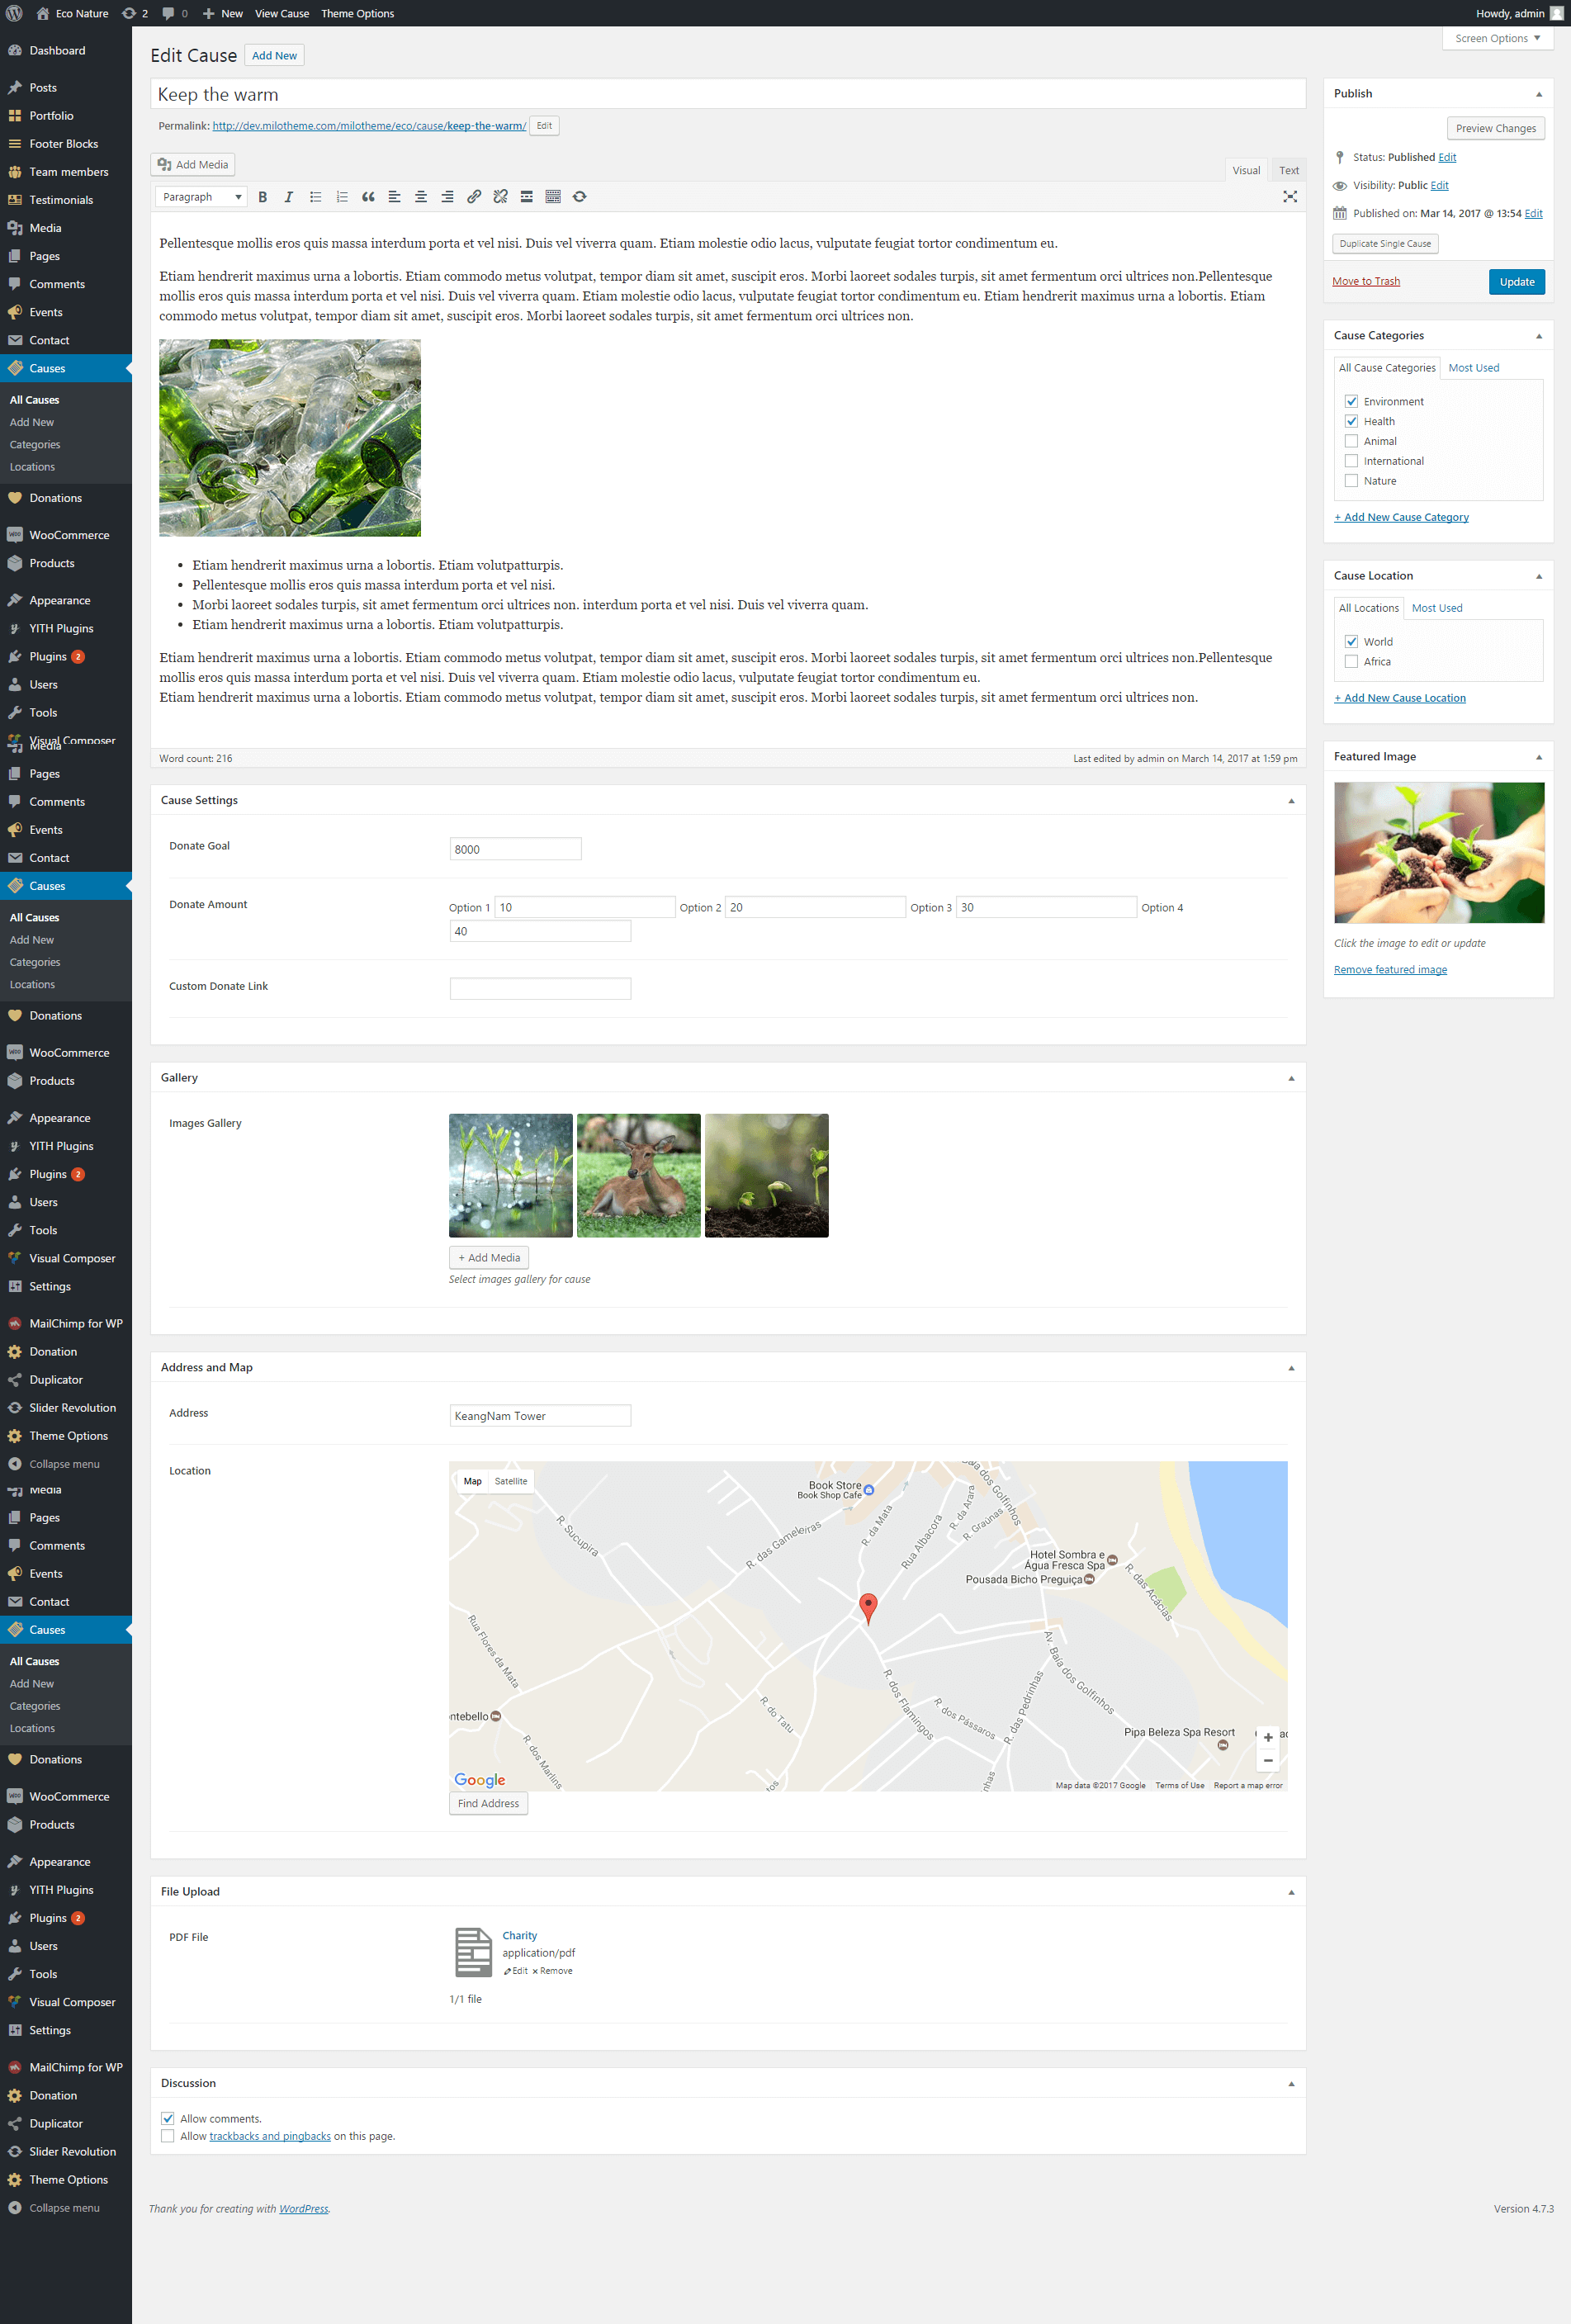
Event Setting
- Please see image below for all event data.
Donation
Donation is auto created when Donor create new donation on your site. However you can create New Event manually
- Step 1: Navigate to Events >> Add New in your WordPress admin sidebar
- Step 2: Enter title and description for Donation item.
- Step 4: Fill all Donation Information
- Step 4: Once you are finished, click Publish to save Event item.
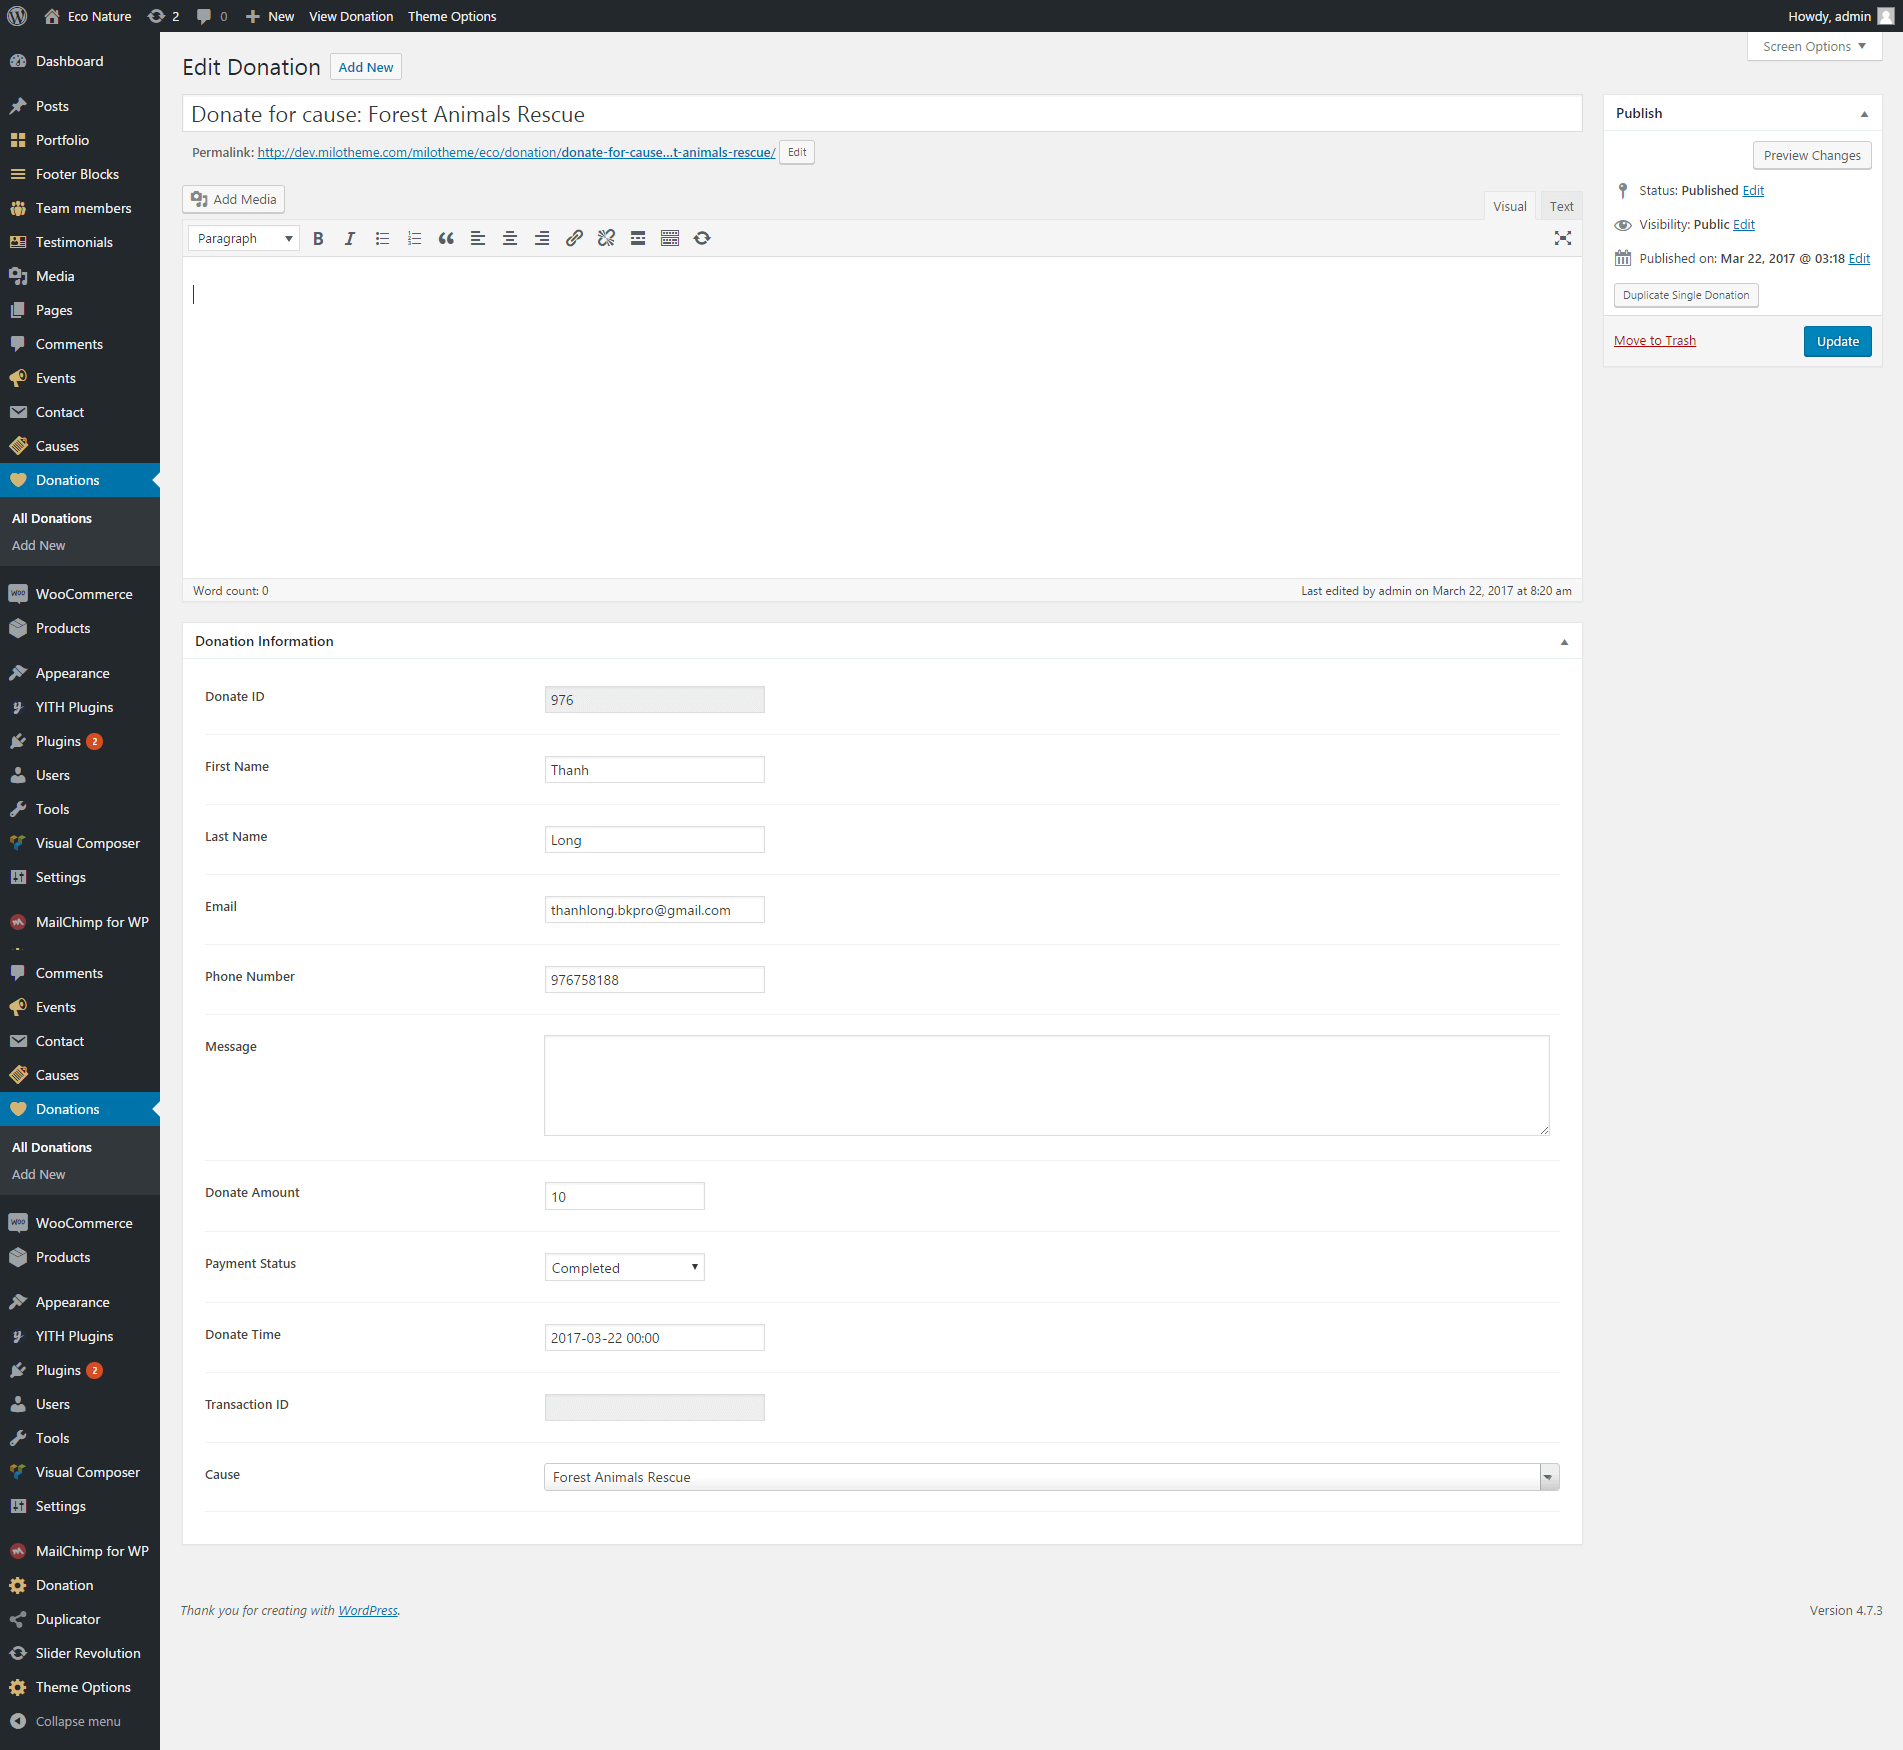
Donation Setting
- Please see image below for all donation data.
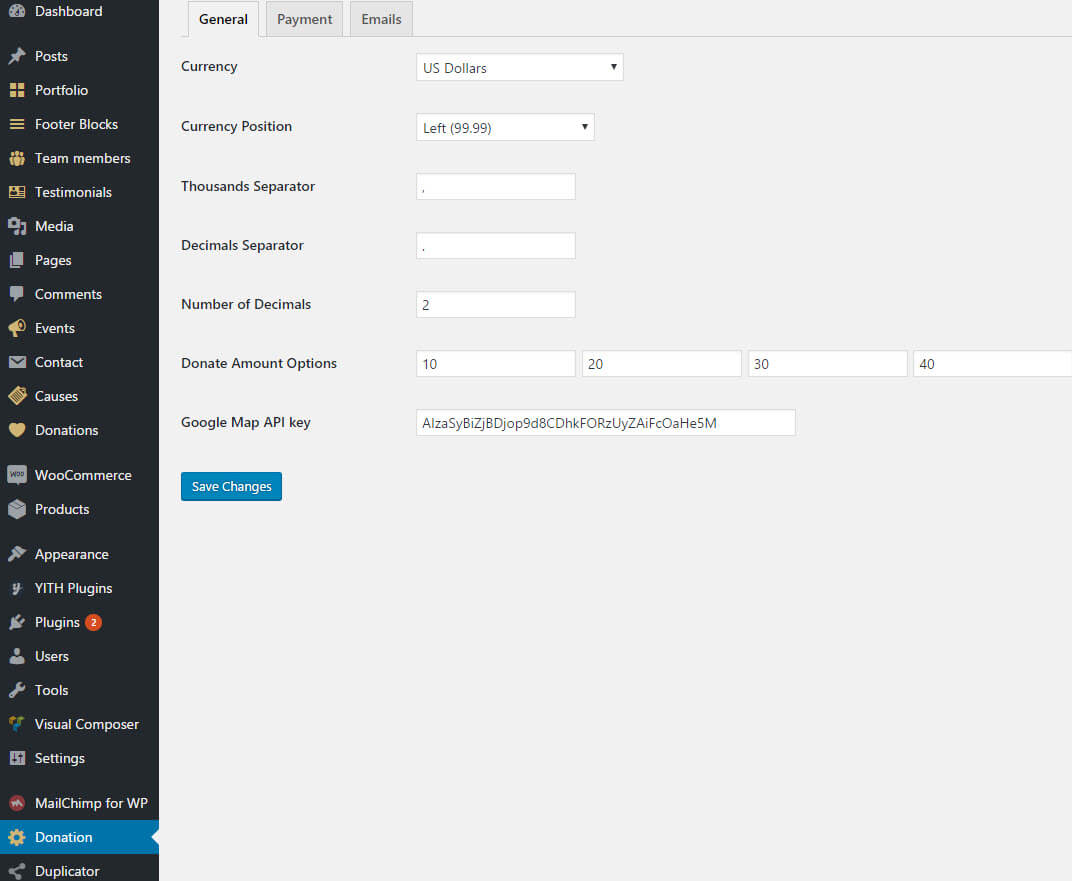
Donation Settings
Navigate to Donation in your WordPress admin sidebar. From here you can configure all setting for donation system of your site.
- General Settings: Currency, Currency Position, Thousands Separator, Decimals Separator, Number of Decimals, Donate Amount Options, Google Map API key
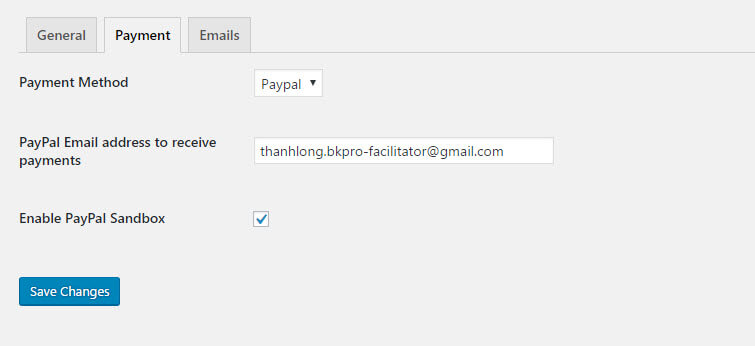
- Payment settings: configure Paypal payment method
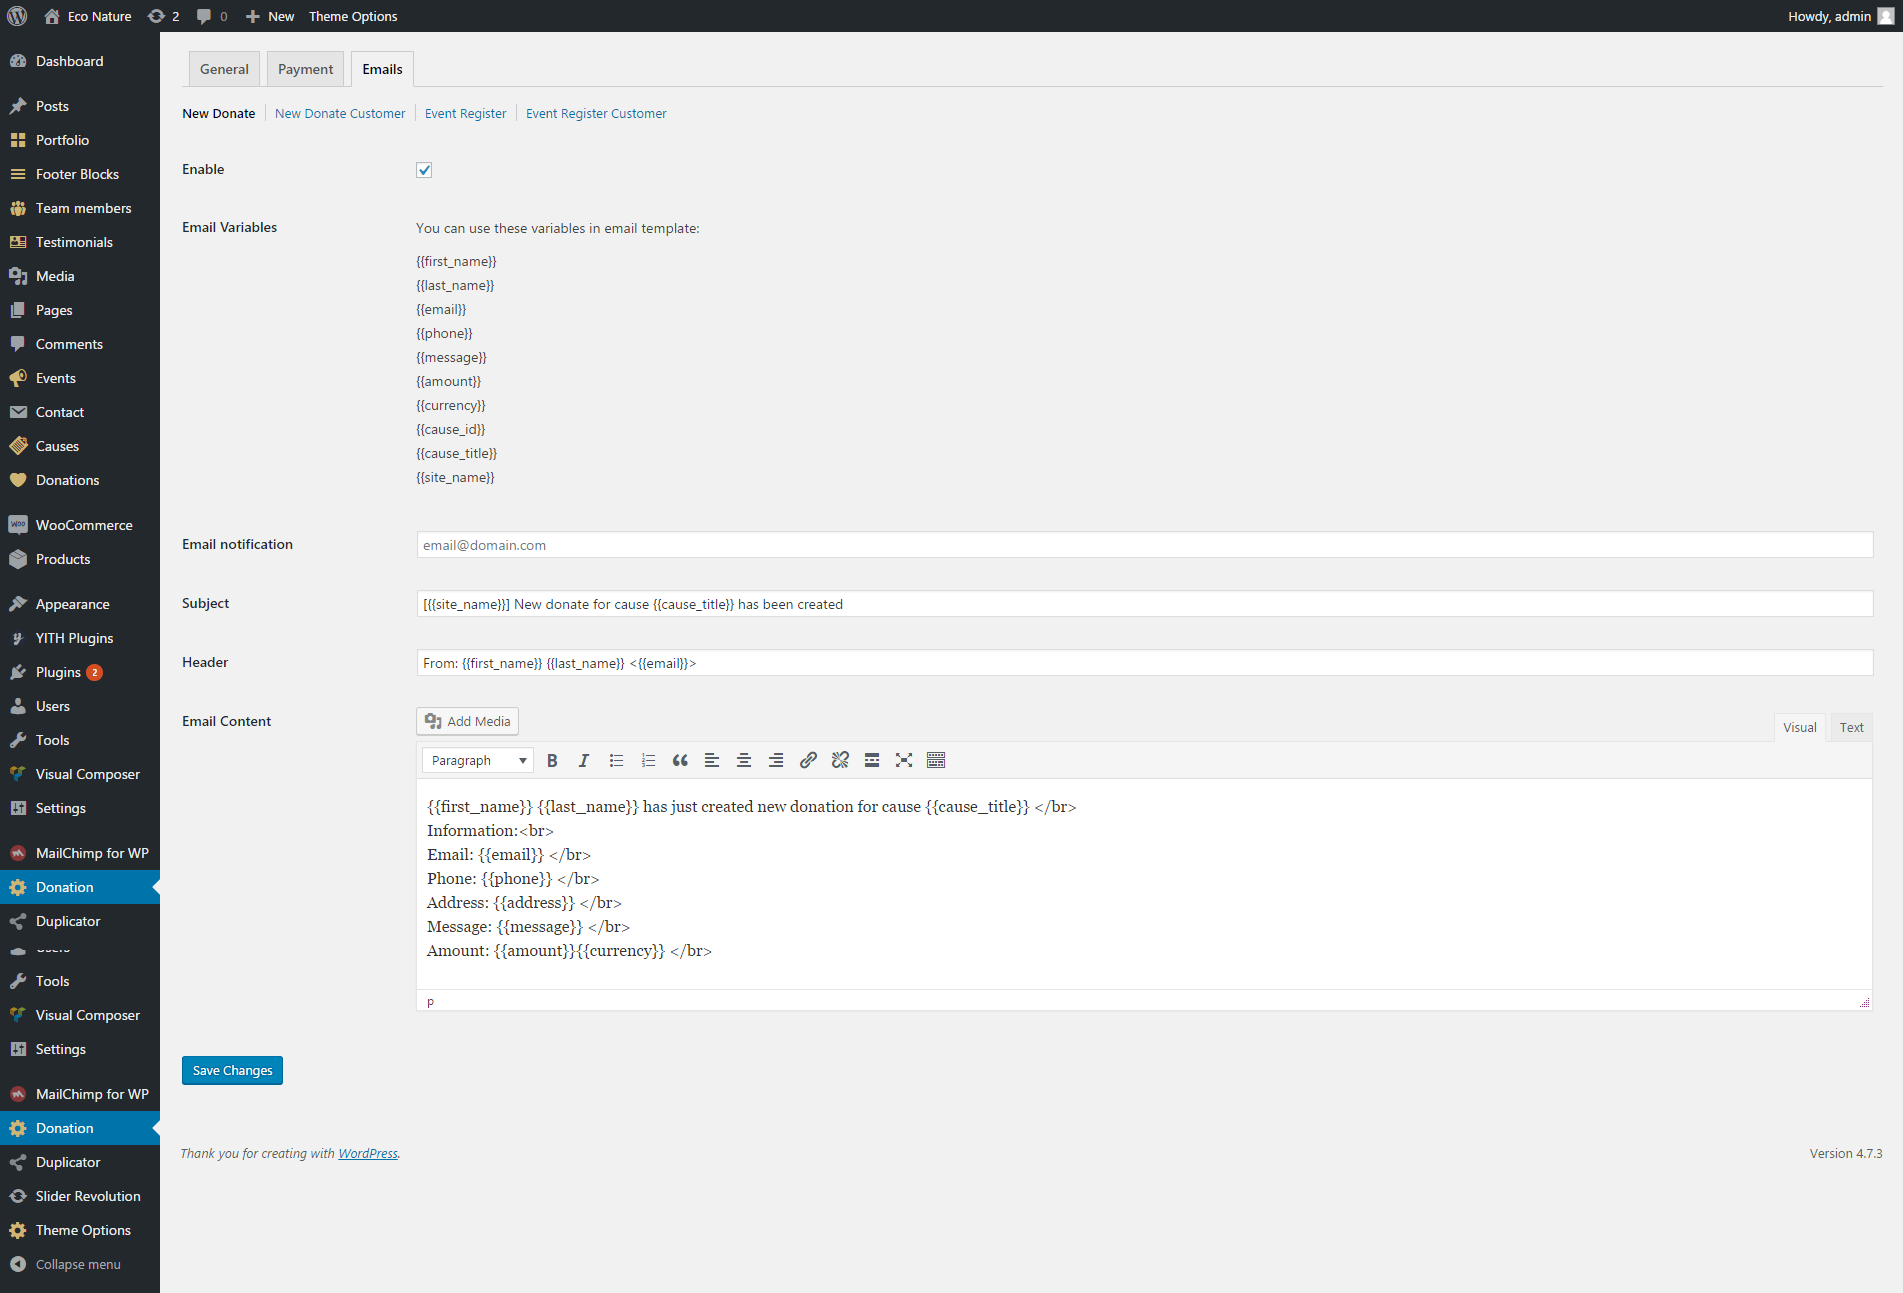
- Email Settings: Email to admin and donor when donor created new donate or when someone register ticket for event.
WooCommerce
Our theme use plugin Woocommerce to build shop online. So you can read the document about this from here to know how to create product or setting shop page:
https://docs.woocommerce.com/documentation/plugins/woocommerce/
How to create New Product
To create a new product, please follow these steps:
- Step 1: Navigate to Products >> Add Product in your WordPress admin sidebar
- Step 2: Insert title and description about product.
- Step 3: Select or Add Categories at the right side.
- Step 4: Select or Add Tags at right side.
- Step 5: Set featured images and Product Image gallery.
- Step 6: Product Data have many type of product. You can choose simple product. With variable product need some more steps to create it. We will have a post on forum to help you make it.
- Step 7: Once you are finished, click Publish to save Product.
Setting Shop & Product Pages
Similar as blog page to show all post, Shop Page use to show all products. Navigate to Woo Commerce >> Settings
In Products tab, navigate to Display sub-tab on the top. From here you can set up your shop page.
Other setting very important is Product image size to help you make the best display for product.
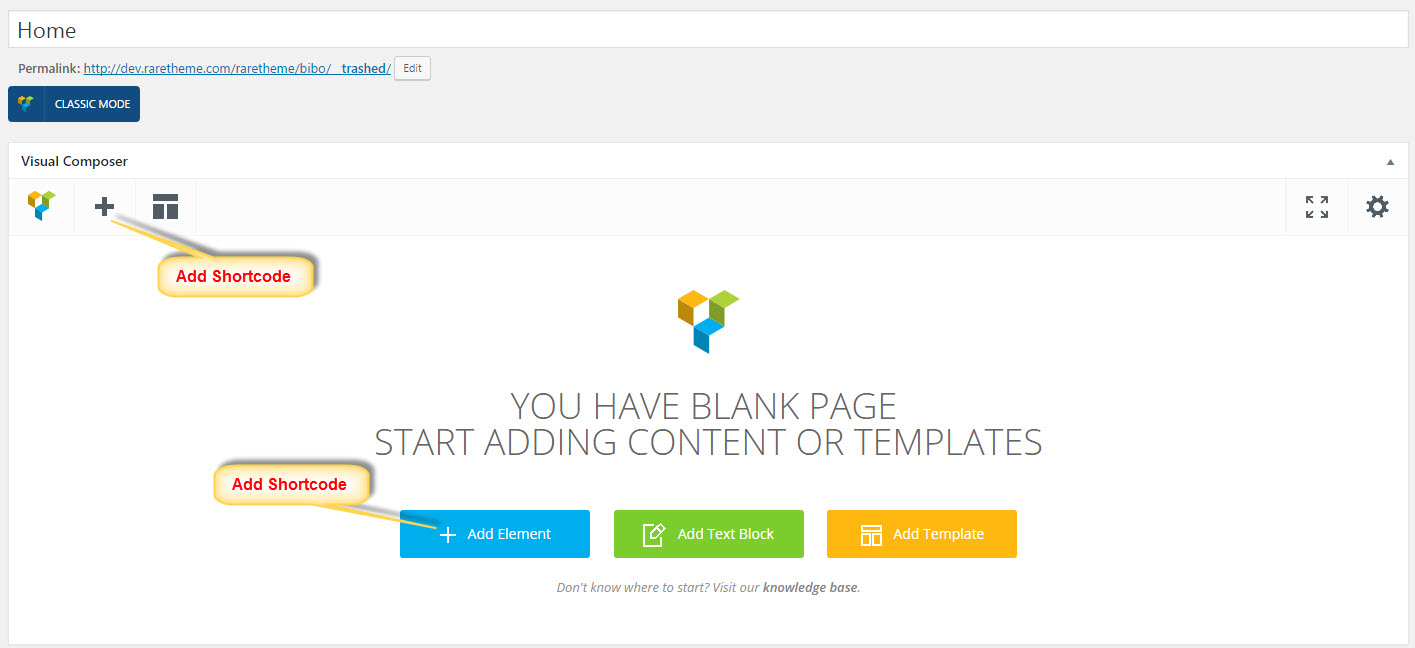
Shortcode
Our theme uses the most powerful’s page builder to help users create sites with ease.
Add content using Visual Composer. Choose Backend or FrontEnd editor.
We made more than 10+ shortcode to help you make your page:
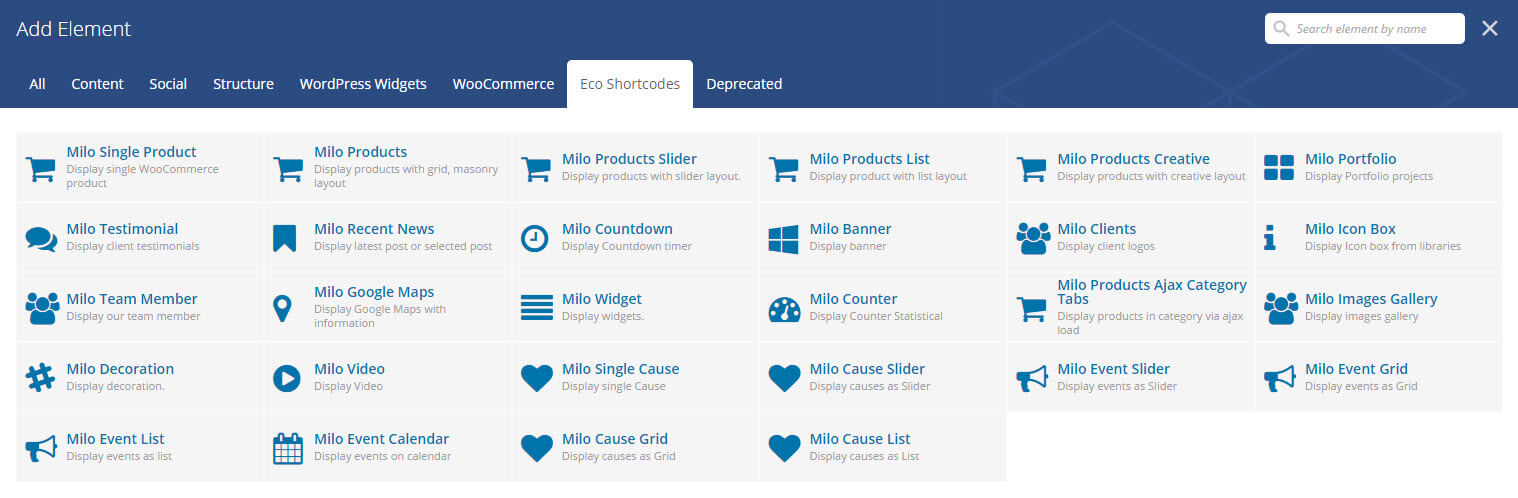
Single Product
Products
Products Slider
Products List
Products Creative
Products Ajax Category Tabs
Recent News
Banner
Clients
Icon Box
Google Maps
Countdown
Counter
Widget
Images Gallery
Video
Team Member
Testimonial
Portfolio
Single Cause
Cause List
Cause Grid
Event List
Event Grid
Event Calendar
WordPress Translation
Our theme is a WPML – compatible and multi language ready theme. We suggest 2 ways to translate our theme.
- Use Loco Translate plugin
- Manual translate using POEdit
Step and step to translate we will have a post on forum asap.
Theme Support
Thank you for purchasing our theme. If you have any questions that are beyond the scope of this documentation, please feel free to us via email milotheme@gmail.com or admin@milotheme.com. Or create topic here: http://milotheme.com. Thanks so much.


More item from MiloTheme